

Easy Crusty Artisan Bread Recipe (No-Knead & 5 Ingredients)
If you thought baking a golden, bakery-style loaf at home required a sourdough starter or hours of heavy counter-kneading, this easy no-knead crusty artisan bread is about to change your baking routine forever.
Growing up, I watched my Nana make bread entirely from scratch. It was her favorite thing to bake. She knew every secret to a perfect rise, kneading dough by hand until her wrists ached and filling the whole house with that unbeatable cozy aroma. While I will always treasure her traditional techniques, I wanted to create a version that fits into our busy modern schedules without sacrificing any of that old-world flavor or texture.
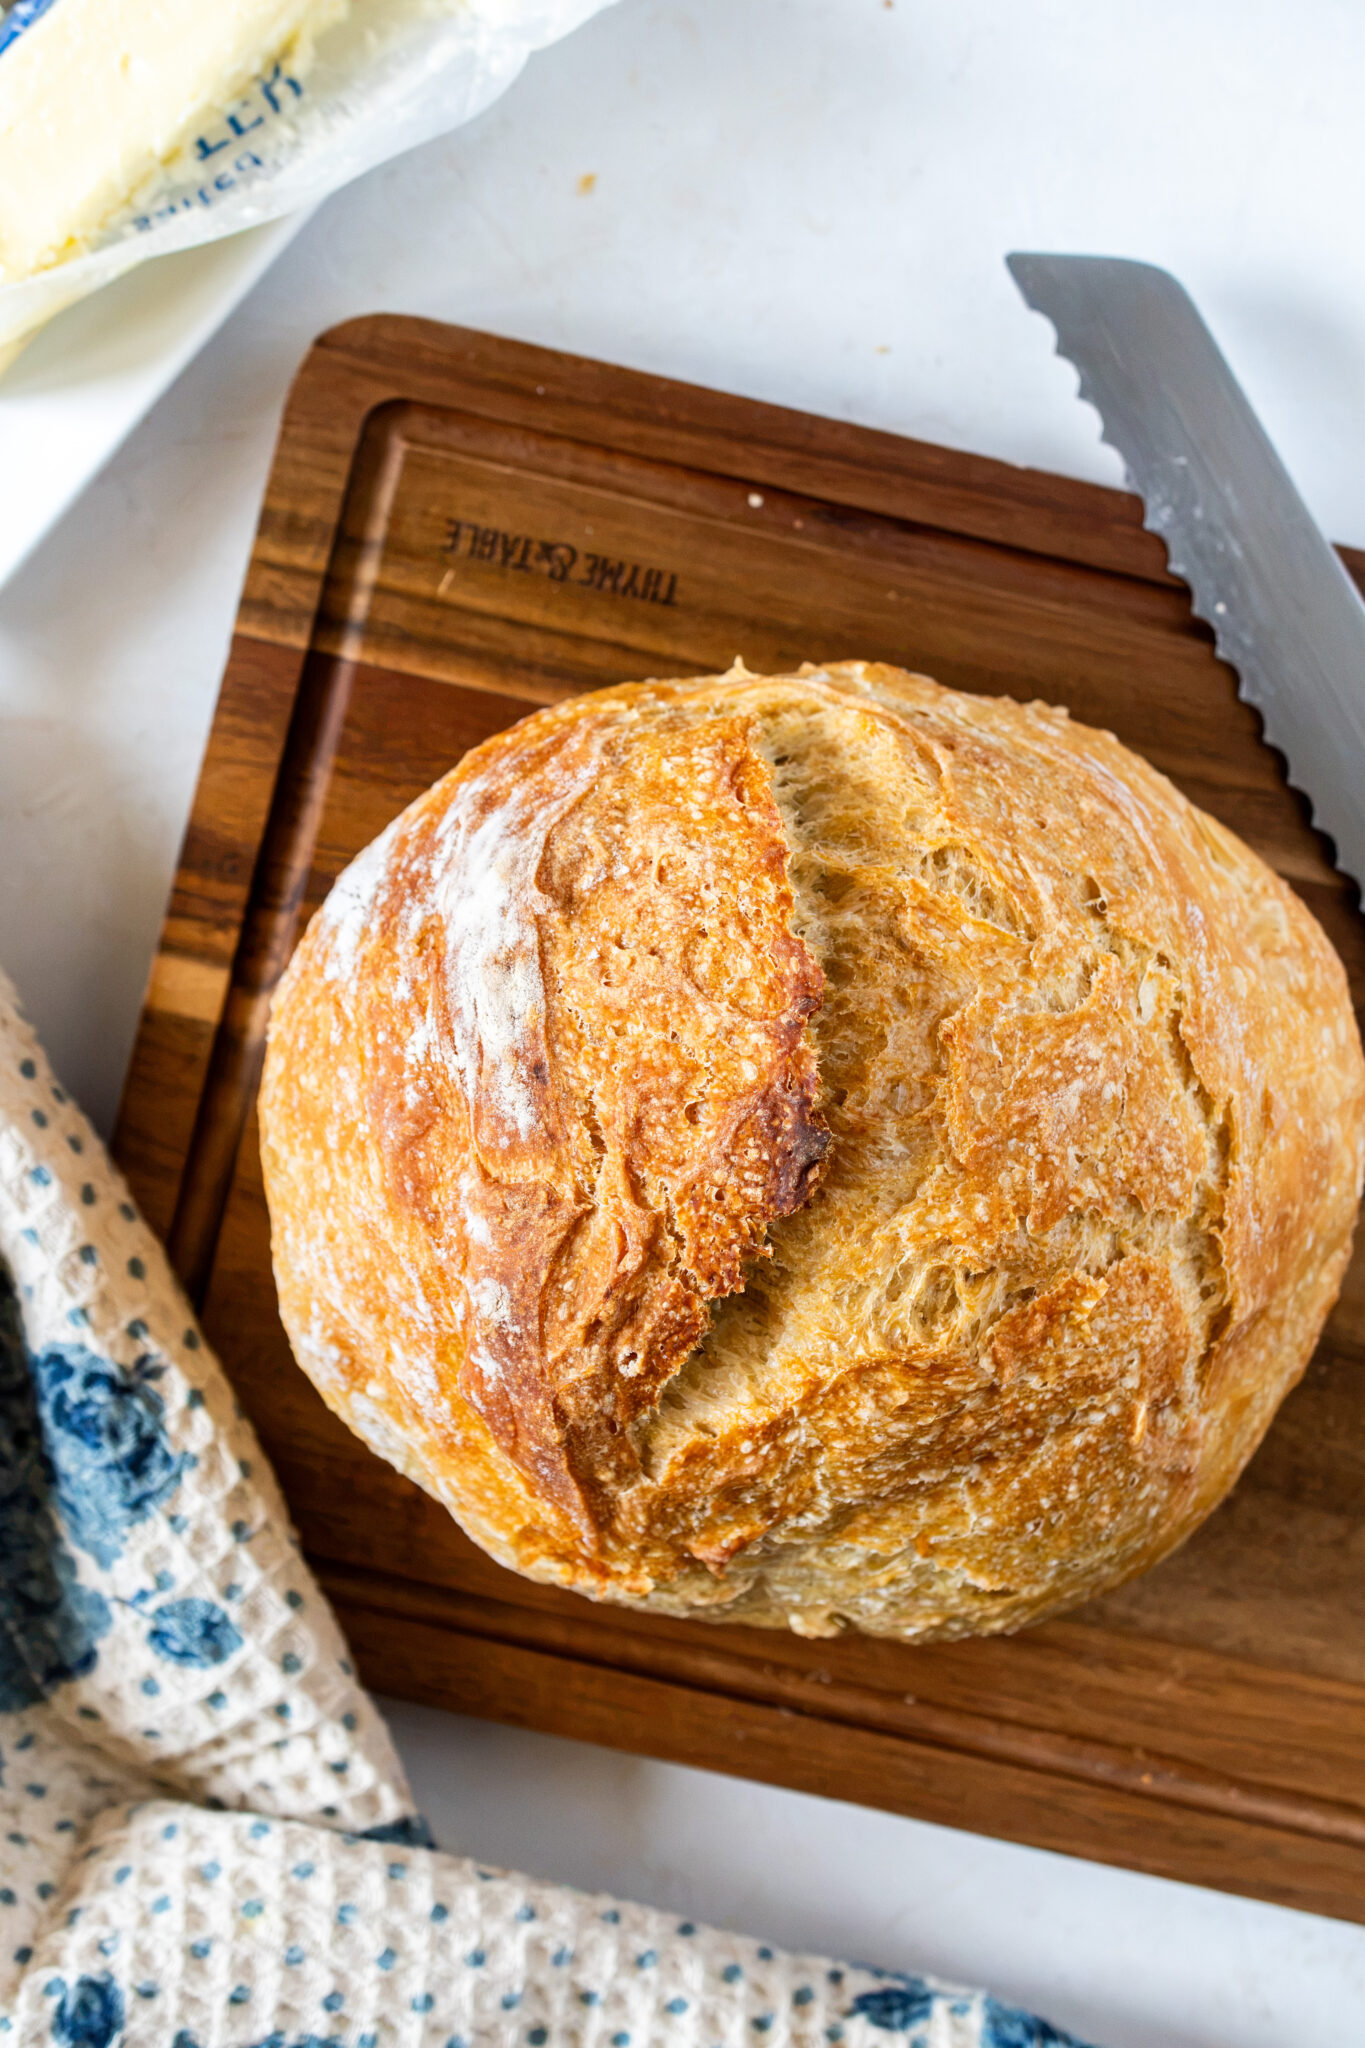
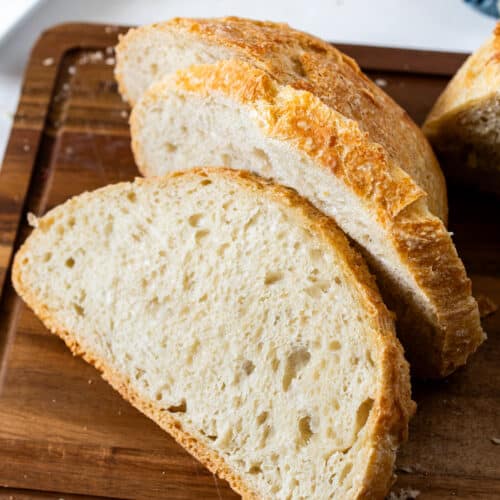
This simple crusty artisan bread recipe gives you everything you love about a classic loaf: a deeply golden, crackly crust on the outside with a soft, tender crumb on the inside. The best part? The dough comes together with just five basic pantry ingredients and uses a few quick rounds of bowl folds instead of traditional kneading. Whether you are brand new to yeast baking or just want fresh bread without the stress, this is the foolproof recipe you will turn to week after week.
[adthrive-in-post-video-player video-id=”Rpdv843o” upload-date=”2026-07-25T17:50:05+00:00″ name=”How to Make Easy No-Knead Crusty Artisan Bread | Everything Just Baked” description=”`Learn how to make the ultimate easy no-knead crusty artisan bread at home using just 5 simple ingredients! In this step-by-step tutorial, Justin from Everything Just Baked shows you how to mix, stretch-and-fold, and bake this Dutch oven bread to golden perfection. No countertop kneading required—just a soft, airy crumb and a blistered, crackly crust every single time.” player-type=”default” override-embed=”default” orientation=”vertical”]
Why You Will Love This Easy Bread Recipe
- Zero Kneading Required: Forget standing over the counter for 15 minutes working a dense ball of dough. A few gentle stretch-and-folds directly in the mixing bowl do all the heavy lifting for you—meaning zero mess on your kitchen counters and zero aching wrists!
- Just 5 Simple Ingredients: Flour, water, yeast, honey, and salt. That is all it takes to make something that tastes as if it came straight from an artisanal European bakery.
- No Mixer or Special Equipment Needed: You do not need a stand mixer, a dough hook, or any fancy kitchen gadgets for this recipe. All it takes is a simple bowl, a wooden spoon or dough whisk, and your hands to create a stunning, bakery-quality loaf from scratch.
Ingredients You Will Need for Crusty Artisan Bread
- Bread Flour: The higher protein content in bread flour (around 12% to 14%) forms a strong gluten network, which traps steam during baking to create that classic chewy crumb and impressive oven spring. Can you use All-Purpose flour? Yes, but AP flour has less protein, so your final loaf will be slightly softer and won’t rise quite as tall.
- Warm Water (100–110°F): Warm water wakes up the yeast. Make sure it is not too hot, as temperatures over 120°F can kill the yeast.
- Instant Yeast: This keeps the rise predictable and reliable without requiring hours of waiting. If you only have active dry yeast in your pantry, don’t worry! Just ensure you bloom it in warm water and honey for 5 to 10 minutes until it gets nice and foamy before adding your flour. The rise time may also be slightly longer.
- Honey: A touch of honey feeds the yeast and helps achieve a gorgeous golden brown crust.
- Salt: Never skip the salt! Salt does far more than just bring out the warm, nutty flavors of the baked grain; it acts as a dough regulator by tightening the gluten structure and slowing down yeast fermentation so your bread doesn’t over-proof and deflate.
Note: Full ingredient quantities and detailed step-by-step instructions are located in the recipe card at the bottom of this post!
Step-by-Step Instructions for No Knead Crusty Artisan Bread
Step 1: Bloom the Yeast (Optional)
In a large mixing bowl, combine the warm water, honey, and yeast. Let it sit for 5 to 10 minutes until slightly foamy on top. This means your yeast is alive and active. If you are confident in your instant yeast, you can skip the wait and mix everything together right away.

Step 2: Mix the Dough
Add the bread flour and salt directly into the yeast mixture. Mix with a wooden spoon or a dough whisk until a shaggy, wet dough forms.
The high moisture content is the secret to those large, tender air pockets inside the loaf. Cover the bowl with plastic wrap and let the dough rest for 30 minutes.


Step 3: Stretch and Fold
Instead of traditional countertop kneading, we use four rounds of stretch and folds:
- Wet your hands lightly with water to prevent sticking.
- Grab one edge of the dough, stretch it upward gently, and fold it over the center of the bowl.
- Rotate the bowl a quarter turn and repeat. Do this for all four sides of the dough.
- Cover the bowl and let it rest for 30 minutes.
Repeat this stretching and folding process three more times, resting 30 minutes between each round. By the fourth round, you will notice the dough transformed from a shaggy mess into a smooth, elastic, and strong ball.

Step 4: Bulk Rise
Cover the bowl and let the dough rise at room temperature until puffy and nearly doubled in size, which takes about 1 to 1 ½ hours depending on how warm your kitchen is.

Step 5: Shape the Dough
Turn the dough out onto a lightly floured work surface. Fold the edges inward toward the center to form a ball.
Flip the dough seam-side down. Gently pull the ball across the counter toward yourself to create surface tension on top of the loaf. Rotate and repeat until the round loaf feels tight. Transfer the dough onto a piece of parchment paper. Cover it loosely with a bowl or plastic wrap and let it rise for 30 to 45 minutes while your oven heats up.

Step 6: Preheat the Oven and Dutch Oven
Place your cast iron Dutch oven with the lid on inside your oven. Preheat the oven to 475°F for at least 30 minutes so the heavy pot gets screaming hot. This trapped heat and steam are key to creating a crispy crust.
Step 7: Score and Bake
Using a sharp bread lame or a razor blade, make one swift slash about ½-inch deep across the top of the loaf. Scoring gives the steam a clean place to escape so the bread rises tall in the oven.
Carefully lift the parchment paper with the dough and lower it into the preheated Dutch oven. Cover with the lid and bake for 20 minutes.
Remove the lid, lower the oven temperature to 450°F, and bake uncovered for another 20 to 25 minutes. The crust should turn a deep mahogany golden brown, and the internal temperature should read between 205°F and 210°F on an instant-read thermometer.
Step 8: Cool
Transfer the bread to a wire rack. Let it cool completely for at least 1 hour before cutting into it. Slicing too early while it is hot traps steam inside and can make the interior feel gummy!

Tips for the Best Crusty Artisan Bread
- Target a Wet, Sticky Texture (Don’t Panic!): This dough is supposed to look wet, shaggy, and sticky. It should look like something you could never knead on a counter with your hands! High moisture is the secret to getting those big, beautiful air pockets inside the loaf.
- Adjust for Your Environment (Trust Your Instincts): Baking bread is equal parts science and feeling. Humidity, room temperature, and even how tightly packed your flour was can change how much liquid the dough absorbs. While you should avoid adding extra flour (which dries out the loaf), you may need to add a splash more water if you notice dry, powdery patches at the bottom of your bowl during mixing.
- Master the Wet Hands Trick: Since this is a high-hydration dough, it will stick to dry skin. Instead of coating your hands in flour when doing your stretch and folds, keep a small bowl of tap water nearby. Dipping your hands in water creates a slippery barrier so you can stretch, fold, and handle the dough effortlessly without making a mess.
- Why Bread Flour Works Best: While all-purpose flour works in a pinch, bread flour has a higher protein content (around 12% to 14%). That extra protein builds a stronger gluten web that traps steam, giving you a taller rise and a delightfully chewy, bakery-style crumb.
- Patience on the Cooling Rack: Resist the temptation to cut into your loaf while it is still piping hot (I know it’s hard!). Bread continues cooking on the inside even after it comes out of the oven. Slicing it too early lets all the trapped moisture escape at once, which turns the interior gummy and dense. Let it cool on a wire rack for at least one hour before slicing.
Why Stretch & Folds Instead of Kneading?
If you have ever made traditional honey white bread or cinnamon rolls, you know the classic routine: turning sticky dough onto a heavily floured counter and pushing, pressing, and folding it with the heels of your hands for ten to fifteen minutes. While that works great for lower-hydration doughs, high-hydration artisan bread requires a completely different approach.
Here is why gentle bowl folds are superior for this recipe:
- Eliminates Countertop Mess: Traditional kneading requires adding cup after cup of extra flour onto your counter to keep the dough from sticking. That extra flour dries out your bread, resulting in a dense, heavy loaf instead of a light, airy crumb. Stretch-and-folds are done directly inside your mixing bowl with wet hands!
- Builds Gluten Naturally with Less Effort: Each time you stretch a corner of the dough upward and fold it over itself, you align and strengthen the gluten strands without working up a sweat. Resting 30 minutes between rounds allows the dough to relax and naturally build structure on its own time.
- Creates Beautiful Open Air Pockets: Gentle handling traps air pockets and steam bubbles inside the dough. Pounding dough on a counter knocks all those delicate gas bubbles out, whereas stretch-and-folds preserve them for that classic, hole-filled bakery texture.

How to Store & Freeze Homemade No Knead Crusty Artisan Bread
Unlike store-bought bread, fresh artisan bread contains zero artificial preservatives. Follow these storage guidelines to keep your loaf fresh and crisp for as long as possible:
Room Temperature Storage (First 2 to 3 Days)
- Keep It Uncut Side Down: Place your loaf cut-side down on a wooden cutting board, or store it inside a breathable paper bag or linen bread bag at room temperature. You can even keep it stored in your Dutch oven!
- Avoid Plastic Bags: Never store fresh crusty bread in an airtight plastic bag or container at room temperature! Plastic traps internal humidity, turning your beautifully crispy crust soft, chewy, and spongy within hours.
- Never Refrigerate Fresh Bread: Storing baked bread in the refrigerator accelerates the retrogradation of starches, making your bread go stale up to three times faster than keeping it on the counter.
Freezing Homemade Bread (Long-Term Storage)
Freezing is the absolute best way to preserve fresh bread without losing quality!
- Slice First: Allow the baked loaf to cool 100% completely on a wire rack, then slice it into individual pieces.
- Flash Freeze: Place parchment paper between the slices so they don’t stick together, then seal them inside a freezer-safe zip-top bag with as much air squeezed out as possible. Freeze for up to 3 months.
- Reheat Directly From Frozen: You do not even need to thaw it! Pop individual frozen slices directly into your toaster or toaster oven for a few minutes. It will taste like a slice from a freshly baked loaf.
Fun Ways to Flavor Your No Knead Crusty Artisan Bread (Variations)
Once you master this baseline 5-ingredient loaf, you can easily use it as a blank canvas for savory or sweet additions!
The best time to add flavor fold-ins is during your third round of stretch-and-folds. Simply scatter your ingredients over the top of the dough before stretching and folding so they get evenly distributed throughout the loaf without tearing the gluten.
Here are a few delicious combinations to try:
- Garlic Herb & Cheddar: Fold in 1 cup of sharp white cheddar (cubed or coarsely shredded), 2 cloves of finely minced garlic, and 1 tablespoon of fresh chopped rosemary or thyme.
- Jalapeño Cheddar: Add 1 cup of shredded cheddar cheese along with ½ cup of diced fresh or pickled jalapeños (pat them dry with a paper towel first so they don’t add extra liquid to the dough!).
- Cranberry Walnut: Toss in ½ cup of dried cranberries and ½ cup of toasted, coarsely chopped walnuts for a slightly sweet, nutty loaf that pairs incredibly well with salted butter or goat cheese.
- Everything Bagel: Mix 2 tablespoons of everything bagel seasoning directly into your flour before adding the liquid, and sprinkle an extra tablespoon over the top of the loaf right after scoring.
- Roasted Garlic & Olive: Fold in ½ cup of drained, chopped Kalamata olives and 8–10 cloves of soft, caramelized roasted garlic.
Frequently Asked Questions
Yes! If you do not own a Dutch oven, place a heavy baking sheet or pizza stone on the middle rack of your oven, and place an empty metal baking pan on the bottom rack. Preheat both. When you put your scored dough onto the hot baking sheet, pour 1 cup of boiling water into the hot metal pan below and quickly close the oven door. This creates the steam needed for a crispy crust.
You can use All-Purpose flour in a 1:1 ratio if that is what you have in your pantry! However, because All-Purpose flour has a lower protein content than Bread flour, your finished loaf will be slightly softer, a bit less chewy, and may not rise quite as tall in the oven. If using All-Purpose flour, start with slightly less water, as AP flour absorbs moisture a bit slower than bread flour.
Absolutely! In fact, a slow cold fermentation in the refrigerator makes this crusty artisan bread recipe taste even better by giving the yeast time to develop complex, deep flavors. After completing your final round of stretch-and-folds, cover the bowl tightly and place it in the fridge for up to 24 hours. The next day, shape your cold dough, let it rest on parchment paper at room temperature for about 45 to 60 minutes to take the chill off while your Dutch oven preheats, then score and bake as directed.
Yeast loves warmth! If your kitchen is cool (especially during winter), the bulk rise can take significantly longer. To speed things up, turn your oven light on (with the oven turned OFF) and place your covered bowl inside. The light bulb generates just enough gentle warmth to create a cozy, draft-free microclimate for your dough to double in size.
Have Extra Yeast? Try These Recipes….

Get to Baking!
There is truly nothing quite like the sound of a fresh loaf of artisan bread crackling as it cools on your counter, or the smell of yeast and warm grain wafting through your home. Baking bread from scratch can feel like a lost art, but this easy no-knead recipe proves that you do not need a professional bakery setup—or years of experience—to pull off something truly special.
I hope this no knead crusty artisan bread recipe brings a little piece of that cozy, homemade joy into your kitchen!
Did you make this easy crusty artisan bread? Leave a star rating and a comment below to let me know how it turned out! And don’t forget to snap a picture, share it on social media, and tag @everythingjustbaked so I can feature your gorgeous golden loaves in my stories!

Ingredients
- 4 cups bread flour (500 g)
- 1⅔ cups warm water (390 g, 100–110°F)
- 1 packet instant yeast (7 g or 2¼ tsp) or active dry yeast
- 2 tsp honey (14 g) or granulated white sugar
- 2 tsp kosher salt
Instructions
Bloom the Yeast (Optional)
- In a large bowl, combine the warm water, honey, and yeast. Let it sit for 5 to 10 minutes until slightly foamy and it smells like bread. This step ensures your yeast is alive. If using instant yeast, you can skip this step and mix everything together immediately if preferred.
Mix the Dough
- Add the bread flour and salt.
- Mix with a wooden spoon or dough whisk until a shaggy dough forms. The dough should be sticky and almost wet. It should be too sticky to knead by hand. If your dough feels dry or isn't coming together, add 1 tablespoon of water at a time until it reaches the right consistency.
- Cover with plastic wrap and let the dough rest for 30 minutes.
Stretch and Fold
- With lightly wet hands, grab one edge of the dough, stretch it upward, and fold it over the center. Rotate the bowl a quarter turn and repeat until you’ve stretched and folded all four sides.
- Cover and let rest for 30 minutes.
- Repeat this process three more times, allowing the dough to rest for 30 minutes between each round. After the final round, the dough should feel much smoother, stronger, and stretchier.
Bulk Rise
- Cover and let the dough rise until puffy and nearly doubled in size, about 1 to 1½ hours.
Shape the Dough
- Turn the dough onto a lightly floured surface.
- Fold the edges toward the center, flip the dough seam-side down, then gently pull it across the counter toward yourself to build surface tension. Rotate and repeat several times until the loaf feels tight and round.
- Transfer the dough to a sheet of parchment paper.
- Cover with a large bowl or lightly greased plastic wrap and let rise for 30 to 45 minutes while the oven preheats.
Preheat
- Place a Dutch oven with its lid inside the oven and preheat to 475°F for at least 30 minutes.
Score and Bake
- Using a sharp bread lame or knife, make one slash about ½-inch deep across the top of the loaf.
- Carefully transfer the parchment and dough into the hot Dutch oven.
- Cover and bake for 20 minutes.
- Remove the lid, reduce the oven temperature to 450°F, and continue baking for 20 to 25 minutes, until the loaf is a deep golden brown and reaches an internal temperature of 205–210°F.
- Transfer the bread to a wire rack and let cool for at least 1 hour before slicing.




that looks absolutely delicious and SO easy to make!! thanks for the directions Justin!