
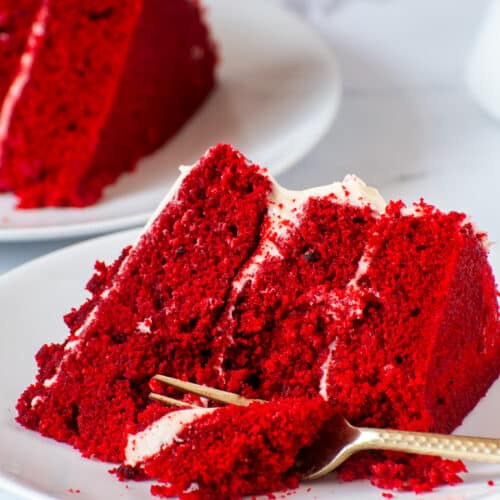
Classic Red Velvet Cake Recipe with Cream Cheese Frosting
I am here to tell you that red velvet cake is not chocolate cake dyed red, nor is it vanilla cake dyed red. Red velvet cake is its own classic dessert, with a delicate cocoa flavor, a soft, tender crumb, and a moist texture that sets it apart from other cakes.
Unlike dry or overly sweet versions, this red velvet cake recipe is carefully formulated with buttermilk, butter, oil, and just enough cocoa to keep it moist for days. Finished with a smooth cream cheese frosting, it is a true bakery-quality cake that works beautifully for birthdays, holidays, and any special occasion.
If you have ever thought red velvet cake was just a gimmick, this recipe will completely change your mind. And yes, it’s time to retire the cake mix.
Looking for more red velvet? Try our Red Velvet Cookies with Cream Cheese Frosting or our Viral Red Velvet Pound Cake.

Why You Will Love This Red Velvet Cake
This recipe is a favorite for a reason. It delivers everything a great red velvet cake should be.
- Incredibly moist and soft without being dense
- Made fully from scratch with simple, classic ingredients
- Balanced cocoa flavor that is rich but not overpowering
- Tender crumb that slices cleanly and evenly
- Paired with a creamy, not overly sweet cream cheese frosting
- Perfect for layer cakes, celebrations, and special occasions
This is the kind of red velvet cake that tastes nostalgic but elevated, just like a true bakery classic.
Red Velvet Cake Is Not Just Chocolate Cake Dyed Red
One of the biggest misconceptions about red velvet cake is that it is simply chocolate cake with red food coloring. That is not true.
While red velvet cake does contain cocoa powder, the amount is minimal and used only to add depth, not a strong chocolate flavor. What truly defines red velvet is the combination of buttermilk, vinegar, and a touch of cocoa. Together, these ingredients create the signature tangy, slightly sweet flavor that sets red velvet apart.
The texture is just as important. The acidic ingredients soften the flour, resulting in a cake that is incredibly tender and light while still feeling rich and indulgent.
Red velvet cake has its own identity, flavor profile, and texture. When made correctly, it is not a gimmick. It is a classic for a reason.
What Makes This Red Velvet Cake So Moist
This cake stays moist because the recipe is designed to retain moisture during baking and long after the cake cools.
Using both butter and oil creates the ideal balance of flavor and softness. Butter adds flavor, while oil helps lock in moisture and prevents the cake from drying out in the refrigerator.
The acidity from buttermilk and vinegar plays a major role in texture. These ingredients tenderize the crumb by limiting gluten formation, resulting in a softer, more delicate cake.
A carefully balanced egg ratio provides structure without heaviness. This allows the cake to rise evenly while staying light and plush.
Finally, adding hot coffee or hot water hydrates the cocoa and loosens the batter just enough to promote even baking. This leads to a cake that bakes through gently, with a moist, tender interior.
The result is a red velvet cake that stays soft, flavorful, and moist from the first slice to the last. Learn more pro tips on how to make a cake moist and fluffy.

Ingredients You’ll Need
This red velvet cake is made with classic, easy-to-find ingredients. Each one plays an important role in the cake’s flavor, texture, and signature red velvet character.
- Cake flour – Creates a lighter, softer crumb than all-purpose flour, giving the cake its tender, bakery-style texture.
- Unsweetened cocoa powder – Adds a subtle depth of flavor without making the cake taste like chocolate. Red velvet should be mild, not rich like chocolate cake.
- Baking powder and baking soda – Work together to give the cake lift and a soft, even rise.
- Salt – Balances the sweetness and enhances the cake’s overall flavor.
- Salted butter – Adds richness and flavor. Unsalted butter can also be used; just add a pinch of extra salt if needed.
- Granulated sugar – Sweetens the cake while helping create structure and a tender crumb.
- Vegetable oil – Keeps the cake moist for days, even after refrigeration.
- Eggs plus one egg white – Provide structure while keeping the cake light and fluffy rather than dense.
- Red gel food coloring – Gives the cake its classic vibrant red color without thinning the batter like liquid coloring can.
- White vinegar – Reacts with the baking soda to create lift and contributes to the signature tangy flavor of red velvet cake.
- Vanilla bean paste or extract – Rounds out the flavors and adds warmth.
- Buttermilk – Adds moisture, tenderness, and a slight tang that defines classic red velvet cake.
- Hot brewed coffee or hot water – Enhances the cocoa flavor and helps create a soft, plush crumb. You will not taste coffee in the finished cake.
Cream Cheese Frosting Ingredients
This frosting is smooth, creamy, and perfectly balanced, complementing the cake. It’s the same recipe from our Cream Cheese Frosting post.
- Full-fat brick cream cheese – Creates a thick, tangy frosting. Avoid whipped or spreadable cream cheese, which can be too soft.
- Salted butter – Adds richness and helps the frosting hold its shape.
- Powdered sugar – Sweetens and thickens the frosting while keeping it smooth.
- Vanilla bean paste or extract – Adds flavor and enhances the cream cheese.
- Salt – Balances sweetness and sharpens the flavor.
How to Make Red Velvet Cake Recipe Step by Step
Step 1: Preheat and Prepare the Pans
Preheat your oven to 350°F (177°C). Grease and flour two 8-inch round cake pans and line the bottoms with parchment paper.
Step 2: Mix the Dry Ingredients
In a medium bowl, whisk together the cake flour, cocoa powder, baking powder, baking soda, and salt until fully combined and lump free. Set aside.

Step 3: Cream the Butter and Sugar
In a stand mixer fitted with the paddle attachment, beat the butter and sugar on medium speed until light and fluffy, about 2 to 3 minutes. Add the oil and mix until fully incorporated.

Step 4: Add the Eggs
Add the eggs one at a time, followed by the egg white, mixing well after each addition. Scrape down the sides of the bowl as needed.

Step 5: Add Flavor and Coloring
Mix in the vanilla extract, vinegar, and red food coloring until evenly combined.

Step 6: Alternate Dry Ingredients and Buttermilk
With the mixer on low speed, alternate adding the dry ingredients and buttermilk, beginning and ending with the dry ingredients. Mix just until combined. Do not overmix.


Step 7: Add the Hot Liquid
Gently mix in the hot coffee or hot water until the batter is smooth and fully combined.

Step 8: Bake the Cakes
Divide the batter evenly between the prepared pans. Bake for 25 to 30 minutes, or until a toothpick inserted into the center comes out clean or with a few moist crumbs.
Step 9: Cool the cakes
Allow the cakes to cool in the pans for 10 minutes, then transfer them to a wire rack to cool completely before frosting.

Best Cream Cheese Frosting for Red Velvet Cake
No red velvet cake is complete without cream cheese frosting. This version is smooth, creamy, and perfectly balanced.
Using full-fat brick cream cheese ensures the frosting is thick and stable. Softened butter adds richness, while powdered sugar sweetens without overpowering the tangy flavor. A touch of vanilla and salt rounds everything out.
The result is a frosting that spreads easily, holds its shape, and pairs beautifully with the soft red velvet layers.
Tips for Perfect Red Velvet Cake Every Time
Follow these simple tips to ensure your red velvet cake turns out soft, moist, and evenly baked every time.
- Use room temperature ingredients. Butter, eggs, and buttermilk mix more evenly at room temperature, which helps create a smooth batter and a consistent crumb. Learn more about the importance of room temperature ingredients + quick hacks!
- Measure flour correctly. Spoon and level your cake flour rather than scooping, or use a scale. Too much flour can make the cake dense or dry.
- Do not overmix the batter. Mix just until the ingredients are combined. Overmixing develops too much gluten and can lead to a tough cake.
- Use gel food coloring. Gel coloring gives a vibrant red color without thinning the batter like liquid food coloring can.
- Check for doneness early. Start checking a few minutes before the suggested bake time. The cake is done when a toothpick comes out clean or with a few moist crumbs.
Cake Pans Matter: Choosing the Right Pan for Homemade Cakes
Believe it or not, the type of cake pan you use affects the outcome of your cake. Here’s why:
- Light Metal Pans: Reflect heat, leading to a more even bake.
- Dark Metal Pans: Absorb heat, causing the cake to bake faster and potentially dry out on the edges.
I highly recommend Fat Daddio’s cake pans. They provide an even bake and help achieve that perfect cake height.
How to Know When Red Velvet Cake Is Done
Red velvet cake is ready when the tops spring back lightly when touched, and a toothpick inserted into the center comes out clean or with a few moist crumbs.
Avoid overbaking, as this can dry out the cake. Start checking a few minutes early for the best texture. Since every oven is different, use baking times as a guideline rather than a strict rule.
How to Store and Freeze Red Velvet Cake
Once frosted, the cake can be stored in the refrigerator, covered, for up to 5 days. Let it sit at room temperature for 30 minutes to an hour before serving for the best texture and flavor.
Unfrosted cake layers can be wrapped tightly and frozen for up to 2 months. Thaw completely before frosting and assembling.
FAQ About Red Velvet Cake
Red velvet cake contains much less cocoa powder than chocolate cake, giving it a subtle chocolate flavor. It also includes buttermilk and vinegar, which create a tangy, tender crumb that sets it apart.
Absolutely, simply follow our Red Velvet Cupcake recipe. It’s the same great taste and flavor designed to bake into perfect cupcakes.
Yes, you can skip the food coloring, but the cake will have a natural reddish-brown hue from the reaction between the cocoa powder and acidic ingredients. It’s still delicious!
For the best texture and flavor, stick to buttermilk. If you don’t have it, you can do a substitute by adding 1 tablespoon of vinegar or lemon juice to 1 cup of milk and letting it sit for 5 minutes. Although I recommend keeping some buttermilk, as I use it in every cake!
I highly recommend cake flour for the softest, most tender-textured cake. If you have to, all-purpose flour will work, but expect a denser, slightly dryer cake. Most of my cake recipes use cake flour, so I highly suggest investing in it.
How to Frost Your Cake Perfectly
Once your red velvet cake layers are completely cooled, it is time to frost. A smooth, even layer of frosting not only improves the look of the cake but also helps lock in moisture and create a polished, bakery-style finish.
If you want step-by-step guidance, my Frosting a Cake Tutorial walks you through the entire process, from applying a crumb coat to smoothing the final layer and creating clean edges. It is an easy, approachable guide that will help your cake look just as good as it tastes.

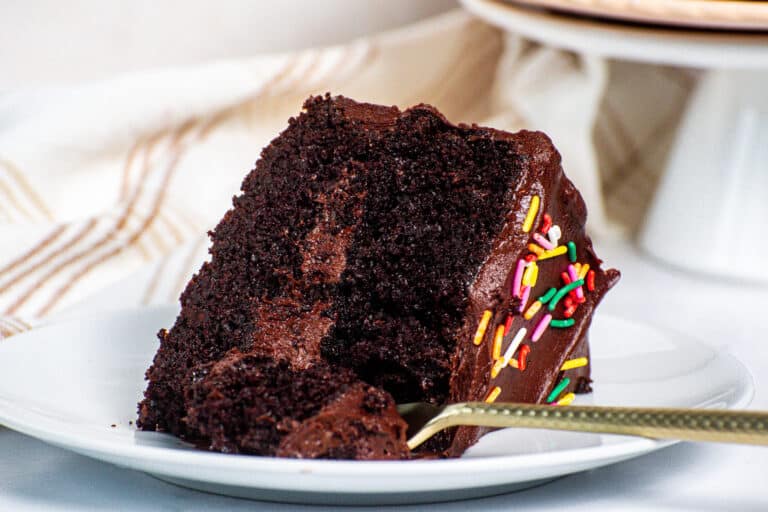
Try our other Famous Cake Recipes:
- Soft and Fluffy Vanilla Cake
- Moist and Decadent Chocolate Cake
- The BEST Funfetti Cake Ever
- Vanilla Pound Cake
- Chocolate Pound Cake
Get to Baking!
This red velvet cake recipe is soft, moist, and made exactly the way a classic red velvet cake should be. It is carefully balanced for flavor, texture, and reliability, making it a recipe you can trust for any occasion.
Whether you are baking for a celebration or simply craving a homemade dessert, this cake delivers consistent results and bakery-quality flavor every time. Pair it with the cream cheese frosting for a timeless combination that never disappoints.
Don’t forget to leave a review and tag me on social media @everythingjustbaked! I seriously love seeing your creations. Happy Baking!
Ingredients
- 2⅓ cups (280g) cake flour
- 2 tbsp (10g) unsweetened cocoa powder
- ½ tsp baking soda
- ½ tsp salt
- 1½ tsp baking powder
- ¾ cup (170) salted butter softened to room temperature
- 1¾ cups (350g) granulated white sugar
- 4 tbsp vegetable oil
- 3 eggs at room temperature
- 1 egg white at room temperature
- 2 tbsp red gel food coloring adjust as needed for vibrant red
- 1 tsp white vinegar
- 2 tsp vanilla bean paste or extract
- ¾ cup (180g) buttermilk room temperature
- ½ cup (120g) brewed hot coffee or hot water
- 16 ounces (454g) full-fat brick cream cheese softened to room temperature
- 3/4 cup (170g) salted butter softened to room temperature
- 4 cups (480g) powdered sugar
- 1 1/2 tsp vanilla bean paste or extract
- pinch of salt to taste
Instructions
- Preheat your oven to 350°F (177°C). Grease and flour two 8-inch round cake pans, or line the bottoms with parchment paper for easy removal.
- In a medium bowl, whisk together the cake flour, baking powder, baking soda, salt, and cocoa powder until well combined and lump-free. Set aside.
- In the bowl of a stand mixer, beat the butter and sugar together on medium speed until light and fluffy. Add the oil and continue mixing until fully incorporated, about 2-3 minutes.
- Add the eggs one at a time, followed by the egg white, mixing well after each addition. Scrape down the sides of the bowl as needed to ensure the mixture is fully combined.
- Mix in the vanilla extract, vinegar, and red food coloring. Adjust the food coloring to achieve your desired shade of red.
- With the mixer on low speed, alternately add the dry ingredients and buttermilk to the butter mixture, starting and ending with the dry ingredients. Mix until just combined, scraping down the sides of the bowl as needed. The batter should be smooth but not overmixed.
- Gently mix in the brewed coffee until just combined. Avoid overmixing.
- Evenly divide the batter between the prepared pans. Bake for 25–30 minutes, or until a toothpick inserted in the center comes out clean.
- Allow the cakes to cool in the pans for 10 minutes, then transfer them to a wire rack to cool completely before frosting.
For the Cream Cheese Frosting:
- Using a handheld or stand mixer paddle attachment, beat the cream cheese and butter together on medium-high speed for about 2 minutes until smooth and creamy.
- Add the powdered sugar one cup at a time scraping down the sides every so often to ensure everything is well mixed.
- Mix in the vanilla extract, and a pinch of salt.
- If the frosting feels too thin, add more powdered sugar a little at a time. If it’s too sweet, a small pinch of salt will balance the flavor. The frosting should be soft but not runny.
- Spread the frosting generously over your cooled cake! Enjoy!


No. Lies. Told. Here!!! This cake is moist even after sitting in the fridge over night!! And the taste — outstanding. This is my new go to recipe for red velvet!! About to make it again!!!
10
I just started self learning how to bake cakes and do two tier cakes. I am having issues make cake crisping smooth and suggestions.
The cake was absolutely amazing! I did however have some issues with the cream cheese icing actually setting enough for a crumb coat. If layering with more than 2 9″ definitely recomend dowels. But was delicious! 100/10 recommend.
PS: As a fellow home baker watching Justin’s videos actually got me to try baking with cake flour. There is a difference in texture as cake flour is finer ground and contains less gluten. Well worth the investment.
Yayyyy! This makes me so happy! Heres a tip though, whenever frosting cakes try to frost in buttercream. Cream Cheese frosting doesn’t solidifying the best in the fridge so if you want a clean cake I recommend filling with cream cheese frosting then frosting in buttercream! This is what i do 🙂
That makes so much more sense 🤣😇 Sometimes we all have blond moments.
Back again for another bake. Trying cupcakes this time around.
I would like to use this recipe for cupcakes. Are there any adjustments needed for cupcakes? Thank you so much for sharing. Love, love, love your recipes!!
Amazing!!!!!! Saw you the first time on Netflix. Tried this recipe and told myself I was swapping the oil out with sour cream. I forgot to use either and worried the cake wouldn’t be moist. I am floored by the taste and moisture even without the oil! Absolutely the best recipe I’ve come across baking any cake from scratch. I appreciate your kindness in sharing the recipe. Wishing you continued success!
I LOVE ALL OF YOUR RECIPES! They are the best! I tweaked a few things for me but, they are amazing.. So are YOU!! 😍😍😍🤩🤩🤩!!!
Just made the cake layers today and it is so tender and moist and delicious! I actually compared two recipes and yours won, with a slight adjustment of subbing some white for brown sugar. I will try more recipes. 🙂
this recipe was a hit for my uncles engagement party. everybody loved it and i received many compliment. its now my go to recipe whenever i need to bake a cake 💖
Made this cake & a couple red velvet parfaits with this recipe. 20/10
So good! Made this into a sheet cake and it was amazing! Thank for a tried and true recipe!
Moist and most delicious 😋
What size sheet pan did you use and what was the baking time?
Can I use fresh beets cooked and puréed and add for the color in place of the red dye? If so, suggestions on how much?
I unfortunately havent tried so Im not too sure. I would think though, beet powder may work a bit better.
I have try many of your recipes and had great success but for some reason this one has had some issues (operator not recipe wise) where i am getting a crater in the bottom and some spots that are more dense i follow the recipe to a T and am unsure what i am doing wrong