
Easy Cake Drip Tutorial: Perfect Drip Recipe & Tips for Beginners
The beauty of a perfectly dripped cake is unmatched. Whether you’re celebrating a birthday, hosting a dinner party, or simply want to impress, adding a drip can elevate any cake to a professional level. But achieving that smooth, flawless drip isn’t always as easy as it looks, especially for beginners. Fear not! This guide breaks down exactly how to make the perfect drip using just two ingredients: white candy melts and water. Follow this simple, beginner-friendly recipe, and learn tips to get a flawless finish every time.
Why Drip Cakes Are So Popular
Drip cakes have taken the baking world by storm, dominating Instagram feeds and bakeries worldwide. The reason? Drip cakes are not only visually appealing but also incredibly versatile. From bold colors to sparkly finishes, a drip can be customized to suit any theme or occasion. Plus, they’re a fantastic way to add that “wow” factor to cakes without requiring professional skills.
Ingredients You’ll Need
This recipe calls for just two ingredients, making it one of the simplest methods out there. Here’s what you’ll need:
- 3 oz of white candy melts – Candy melts are designed for smooth, even melting, making them ideal for drips. They come in various colors, allowing you to customize your drip for any occasion.
- 0.5 oz of water – Water might seem like an unusual addition, but it helps thin out the candy melts just enough for that perfect drip consistency.
You may wonder, “Why use water instead of cream?” Water keeps the consistency light and easy to control, making it ideal for beginners aiming for a clean drip. Plus, water helps manage the thickness without overpowering the cake’s flavor—and let’s be honest, heavy cream is expensive! Save that for other treats. For a colored drip, you can use candy melts in your desired shade or simply add gel food coloring to the melted mixture to achieve the perfect color.
Why Don’t Chocolate and Water Usually Mix? (And Why This Recipe Works!)
You might have heard that water and chocolate don’t mix—and normally, that’s true! When water is added to melted chocolate, it can cause the chocolate to “seize,” turning it into a thick, grainy mess instead of a smooth, pourable mixture. This happens because chocolate contains cocoa solids and fats, which don’t naturally mix with water. Just a few drops can disrupt the smooth texture, making it clump up.
So why does it work here?
In this recipe, we’re using candy melts rather than pure chocolate. Candy melts are designed to be easier to melt and are more forgiving when mixed with a small amount of liquid. They contain stabilizers and oils that help them maintain a smooth consistency, even with a bit of water added. By adding water slowly and stirring thoroughly, you create a drip mixture that’s thin enough to flow beautifully down the sides of a cake, yet stable enough to set nicely without seizing.
This combination makes candy melts and water an ideal, budget-friendly solution for cake drips, especially for beginners looking for a reliable, easy-to-control consistency.
Step-by-Step Guide: How to Make the Perfect Cake Drip
Achieving the ideal cake drip is all about technique. Follow these simple steps:
- Prepare Your Cake
Before you start, ensure that your cake is completely chilled. A cold cake will set the drip faster, preventing it from running too far down. Whether it’s a layer cake or a single-tier, having a firm, cold surface will make the drip process much smoother. - Melt the Candy Melts
Place your 3 oz of candy melts in a microwave-safe bowl. Microwave in 15-second intervals, stirring in between each interval. Candy melts heat quickly, so make sure you don’t overheat them; otherwise, they can burn and become clumpy. - Add the Water
Once the candy melts are fully melted and smooth, add the 0.5 oz of water gradually while stirring constantly. The mixture should become thinner, creating a pourable consistency. If you find that it’s too thick, add a tiny bit more water. - Check the Consistency
Your drip mixture should be thin enough to pour but thick enough to hold its shape on the cake. To test, lift a spoon and let some mixture drip back into the bowl. If it falls in a smooth, controlled stream, it’s ready to go. - Apply the Drip
Using a spoon or a squeeze bottle, slowly pour the mixture over the edges of the cake. Work your way around the cake, allowing each drip to fall naturally. If using a spoon, carefully let the mixture slide over the edge; for a squeeze bottle, lightly squeeze to control the drip length. - Let It Set
Once the drip is complete, allow it to set for 5-10 minutes. Since the cake is chilled, the drip should harden quickly.
Expert Tips for Perfect Drips Every Time
Here are some expert insights to make your drip look flawless:
- Adjust the Temperature
If your cake is too warm, the drip may run down the sides too quickly. Keep your cake in the fridge until it’s completely firm to the touch. - Choose the Right Tool
If you’re new to drip cakes, start with a squeeze bottle to control the drip length better. A spoon can work, but it requires a steadier hand and some experience. - Custom Colors
For a customized drip, add gel-based food coloring to the melted candy mixture adjusting to your desired color. - Test First
Before committing, test your drip on a plate. This lets you gauge the thickness and control better before dripping it directly onto the cake. - Double The Recipe
This recipe makes a small amount of chocolate drip. Feel free to double or triple the recipe based on your needs.
Common Drip Mistakes and How to Fix Them
Even experienced bakers sometimes encounter issues with cake drips. Here’s how to troubleshoot some common problems:
- Too Thick
If your drip mixture is too thick, add a tiny bit more water, stirring gently until you reach the desired consistency. - Too Runny
If your drip mixture is too runny, microwave it for a few more seconds to allow some water to evaporate and thicken it up. Alternatively, you can add a bit more melted candy melts to achieve a thicker consistency. - Drip Runs to the Bottom
This is usually due to a warm cake or overly thin mixture. Chill your cake thoroughly before starting, and test the consistency before applying. - Uneven Drips
Keep a steady hand and pour consistently to achieve a uniform look. Use a turntable to make the process easier and keep the drip even around the cake.
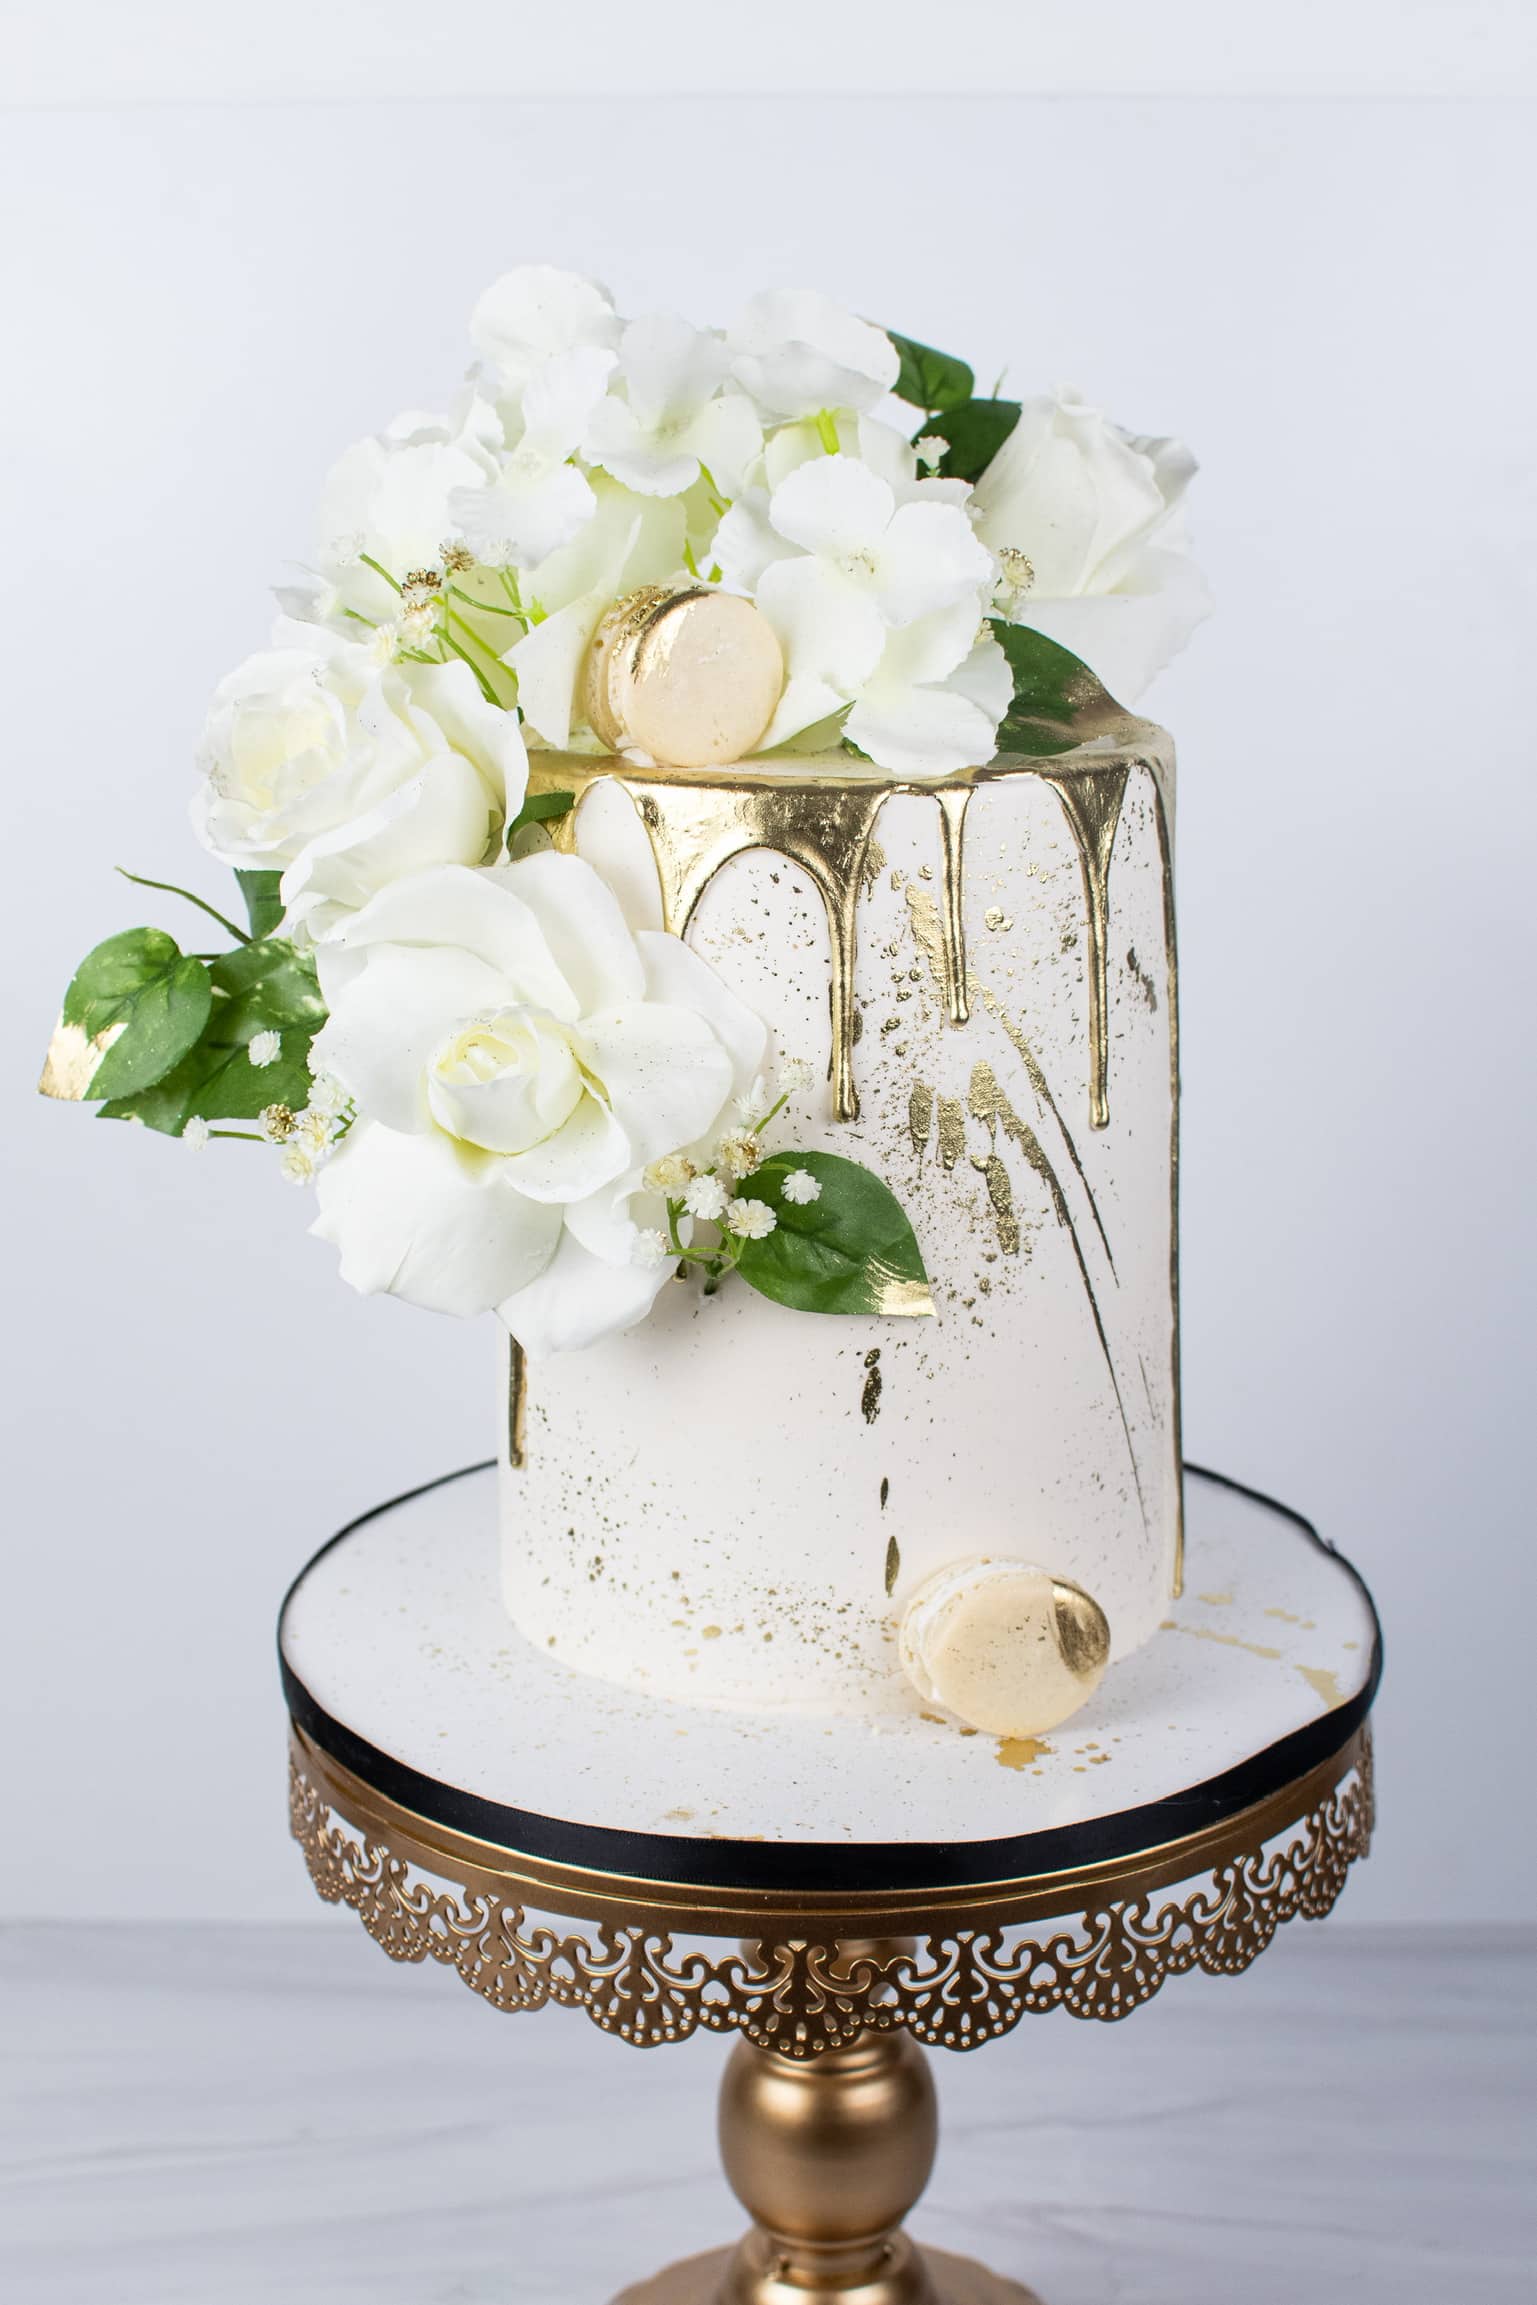
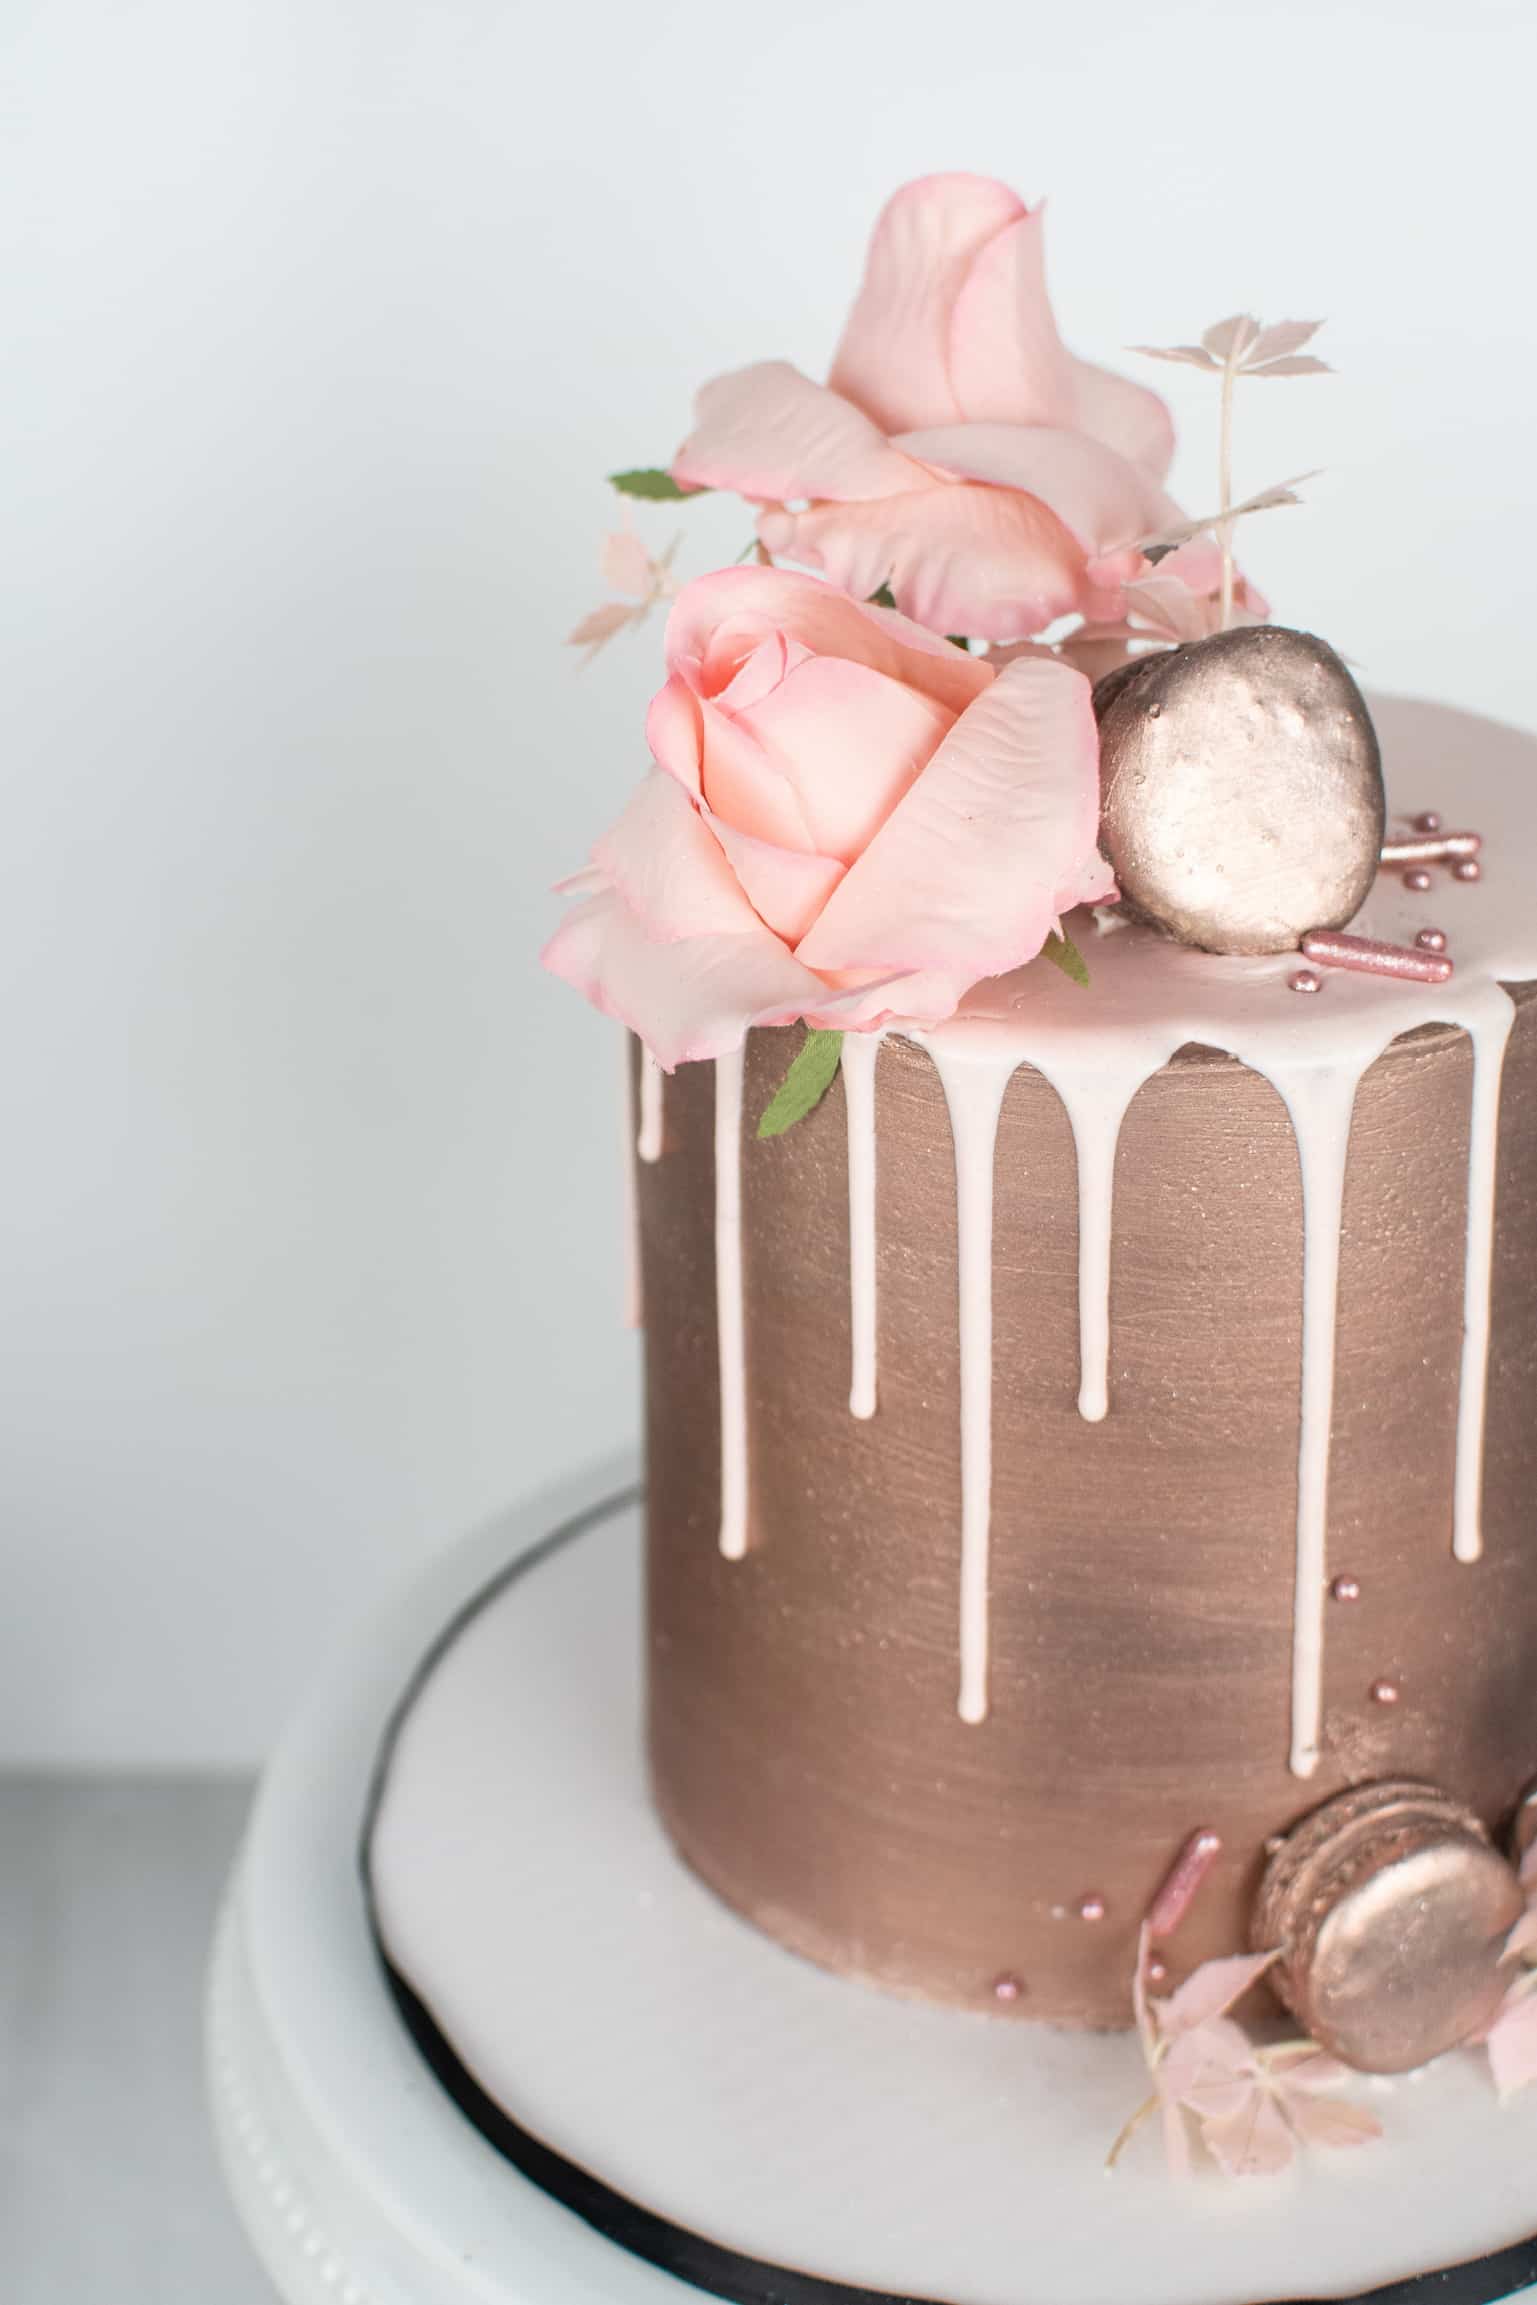
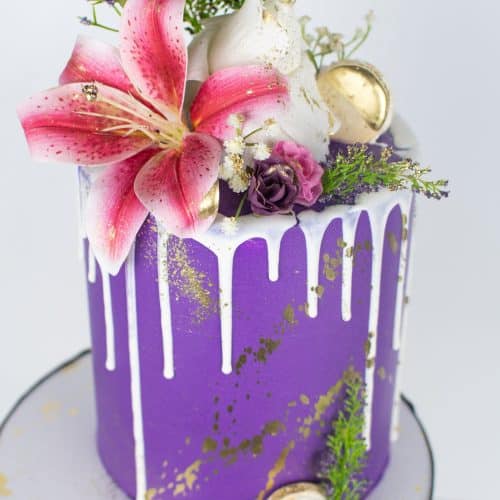
How to Create a Gold Drip Effect
Adding a gold drip to your cake brings a luxurious, eye-catching finish that’s perfect for special events. All you need is edible gold dust and a clear alcohol, like vodka or a clear extract.
To make the gold paint, mix a small amount of edible gold dust with a few drops of clear high-grade alcohol until it forms a smooth, paintable consistency. After your cake drip has set, use a fine brush to carefully apply the gold mixture over each drip. The alcohol evaporates quickly, leaving a brilliant metallic finish that looks professional and polished.
For extra shine, let the first layer dry completely, then apply a second coat. This technique gives you a rich, golden effect without needing specialty tools or ingredients—just a bit of gold dust and clear alcohol for a dazzling result!
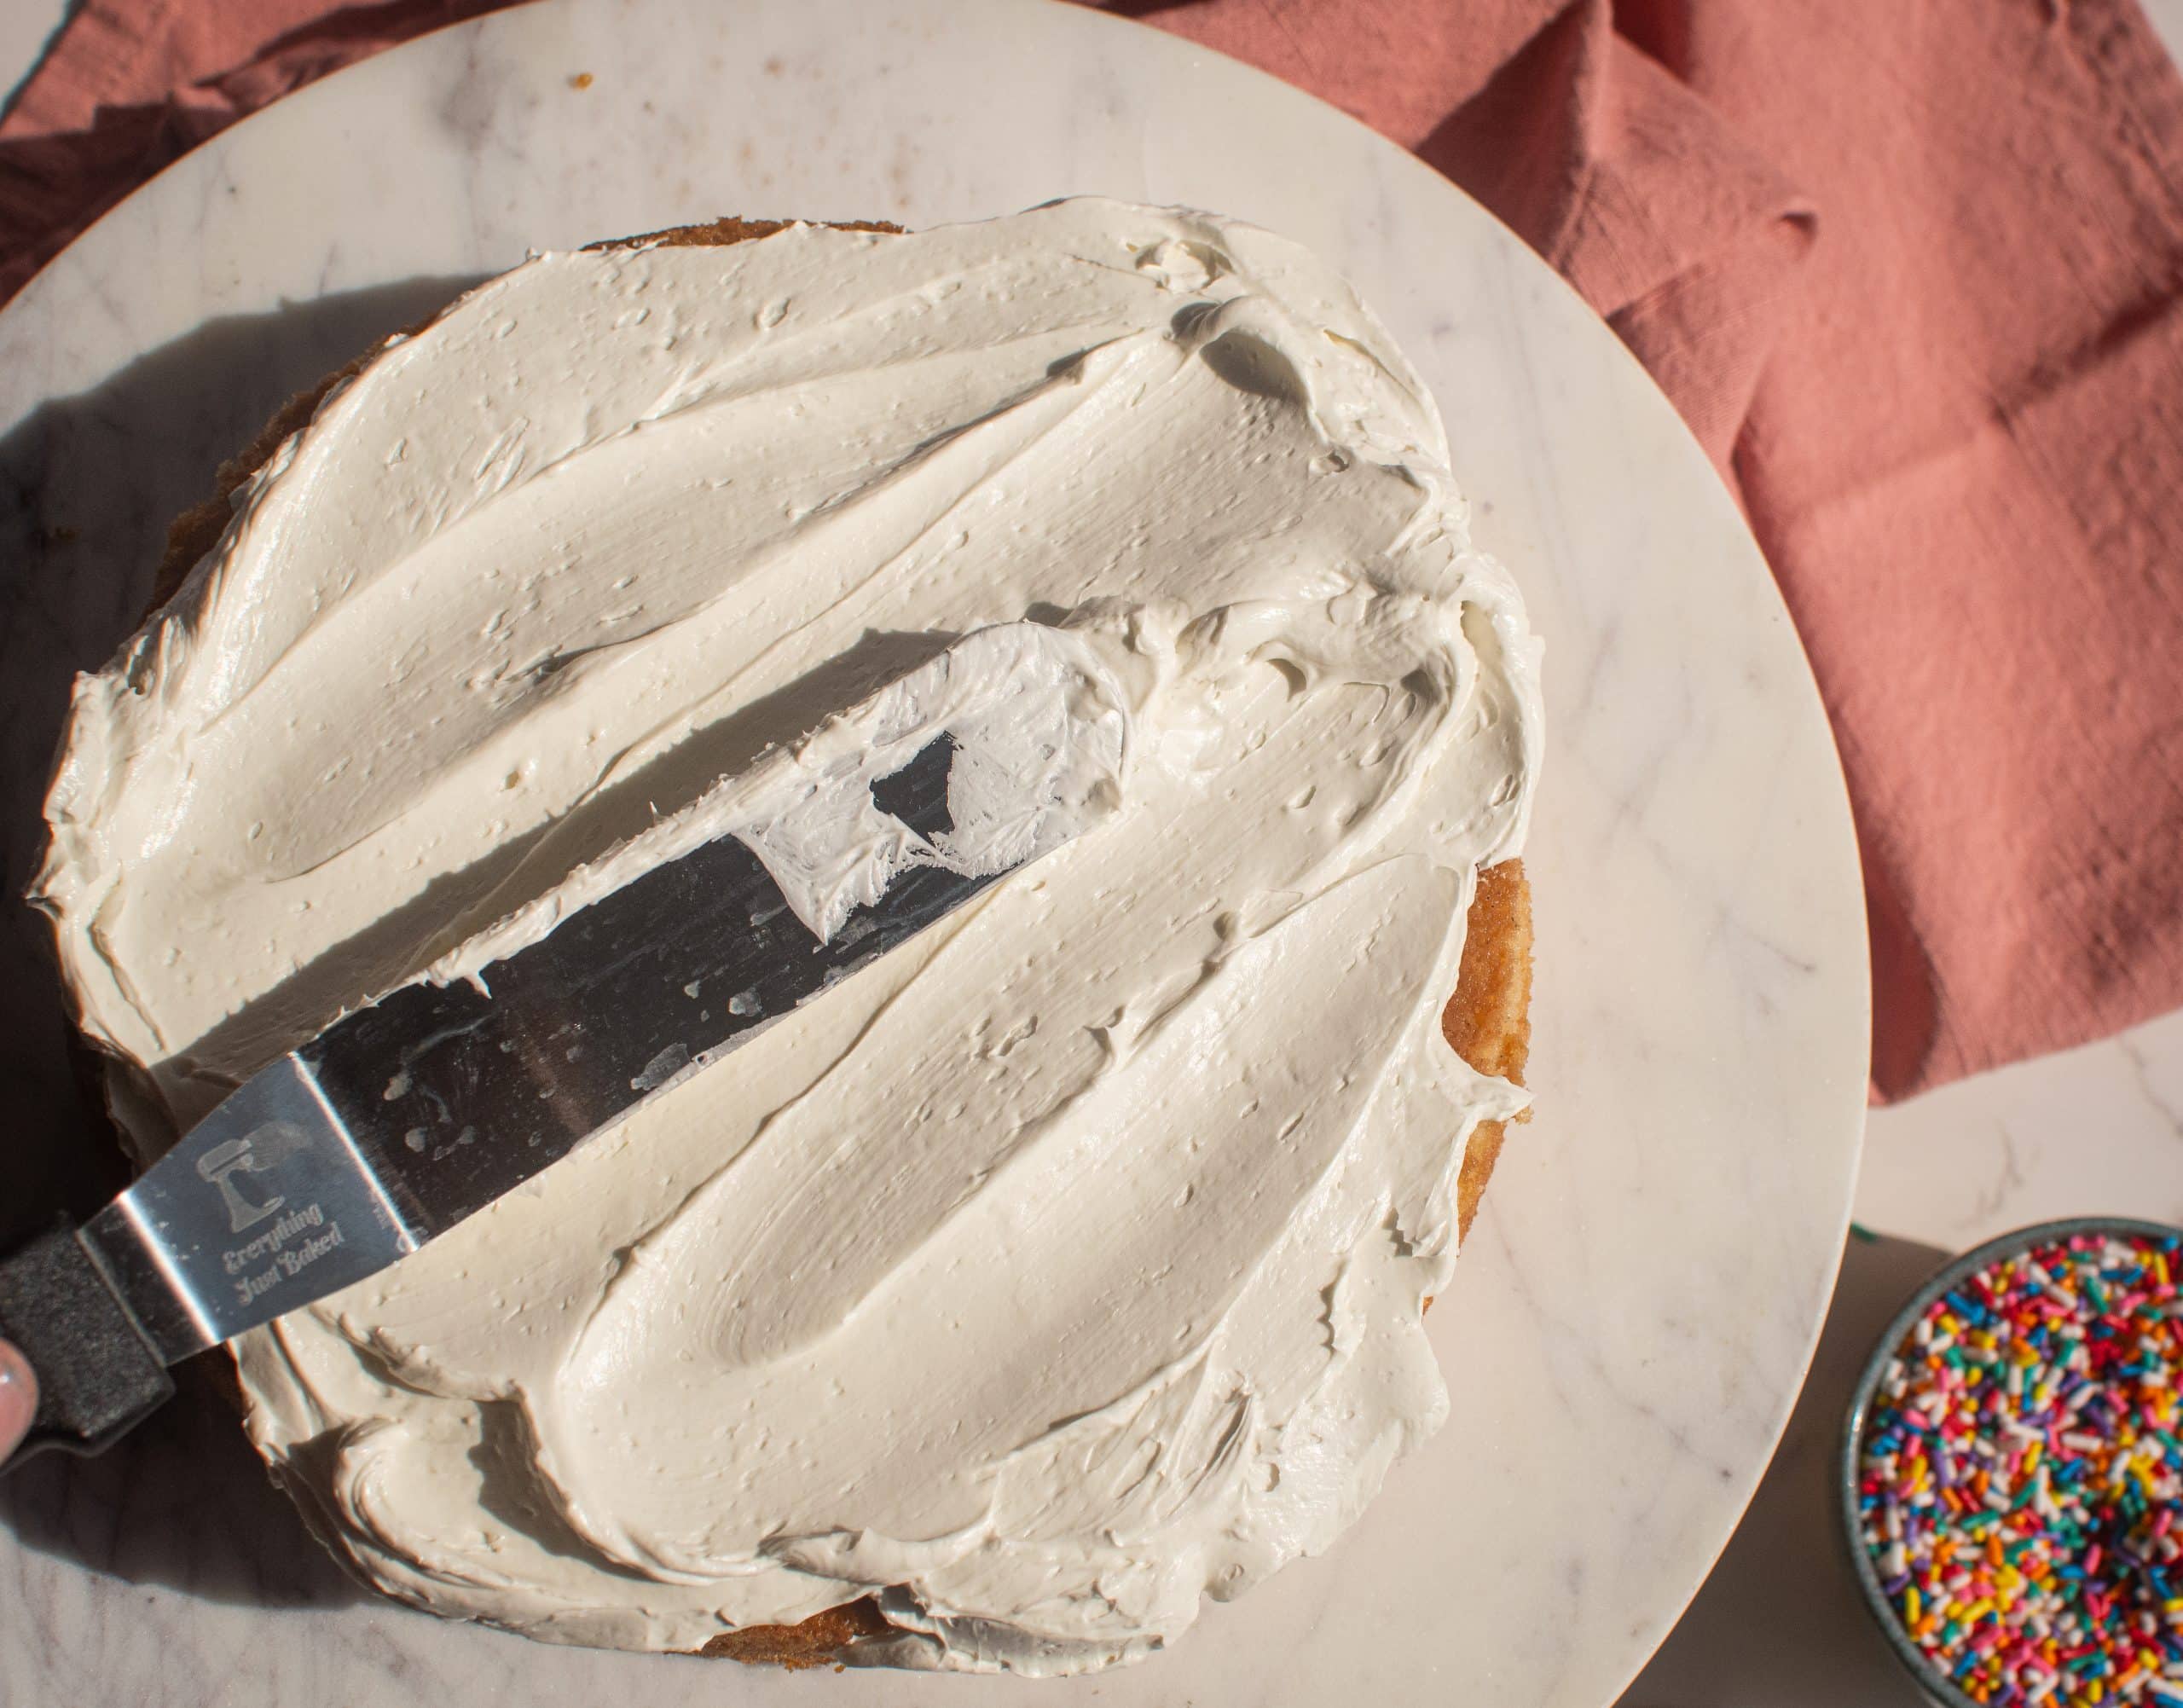
How to Frost a Cake Like a Pro
Before you add a drip to your cake, achieving a smooth and even layer of frosting is key. A well-frosted cake provides the perfect base for a stunning drip. If you’re new to frosting cakes or just looking to improve your technique, check out our detailed Guide to Frosting a Cake Like a Pro for step-by-step instructions, helpful tips, and tools you’ll need to get that flawless finish.
Here’s a quick overview of the process:
- Crumb Coat – Start by applying a thin layer of frosting, known as the crumb coat, to lock in any loose crumbs and create a smooth surface for your final coat. Chill the cake for 10-15 minutes to set this layer.
- Final Layer – Once the crumb coat is firm, add a thicker layer of frosting. Use a spatula or an offset spatula for even coverage and a cake scraper to smooth the sides.
- Chill Again – To ensure the frosting sets perfectly, chill the cake again before adding your drip. A cold, firm surface helps the drip set quickly and prevents it from running too far down.
For more in-depth instructions, helpful visuals, and troubleshooting tips, visit our full How to Frost a Cake Like a Pro post to take your frosting skills to the next level!
And there you have it—a simple yet stunning way to create a perfect cake drip every time. With just candy melts and water, you can transform any cake into a showstopper, impressing family and friends alike. Whether you’re a beginner or an experienced baker, this drip technique is both versatile and foolproof. Try it out, get creative, and let your cake become the star of your next celebration!
Try Our Cake Recipes
Ready to take your cake-making skills to the next level? Explore our collection of delicious and easy-to-follow cake recipes! Whether you’re a beginner or a seasoned baker, these recipes are perfect for creating cakes that look as amazing as they taste. From classic vanilla to rich chocolate cake, we have a recipe for every craving. Pair these with our cake drip tutorial to add a stunning finishing touch. Dive in and start baking!
Ingredients
- 3 oz Candy Melts (bright white is my go too)
- 1 tbsp warm water
- Gel food coloring
Instructions
- Place candy melts in a microwave-safe bowl.
- Microwave the candy melts in 15-second intervals, stirring between each interval until fully melted and smooth. Avoid overheating to prevent clumping.
- Gradually add warm water to the melted candy melts, stirring continuously. Mix until smooth and fully combined, creating a pourable consistency.
- Test the consistency by letting a small amount drip from a spoon. If too thick, add a few more drops of water; if too thin, microwave for a few seconds to thicken or add more chocolate.
- Color the Drip (Optional): If adding color, mix in a few drops of gel food coloring until the desired shade is achieved. Ensure the color is evenly distributed.
- Using a spoon or squeeze bottle, apply the drip around the edges of a chilled, frosted cake. Allow each drip to fall naturally down the sides of the cake.
- Let the drip set for 5-10 minutes in the fridge before adding additional decorations or serving.


Hello,
I have a question please.
You suggest to add a second covering drip to the first gold drip. Are you doing another chocolate drip over the first gold drip or are you dry dusting over it with the gold dust? If you are suggesting to do another drip over the first drip how do we get the second drip to be at the same length as the first drip? Also, should we do a second drip over a white or colored drip?
Thank you for the fantastic advice you give. I learn so much from you while having fun. Your personality is fabulous.
thank you!!!! I suggest doing a regular drip (it can be any color) and letting it completly set. Then mix gold dust and alchohol together and carefully paint the hardened drip. Hope that clarifies 🙂