How to Make a Heart Cake: Easy Step-by-Step Tutorial
If you’re looking for the perfect way to show some love (literally), a homemade vintage heart-shaped cake is the ultimate sweet gesture. Whether it’s for Valentine’s Day, an anniversary, a birthday, or just because, this cake is guaranteed to make hearts flutter. Ditch Walmart’s $25 heart cake and make it yourself!
In this step-by-step heart cake tutorial, I’ll show you exactly how to make a stunning heart-shaped cake — no special pans required (yes, really!). From shaping the cake to decorating it beautifully, plus all my best tips for getting those clean edges and smooth frosting, you’ll have everything you need to create the perfect centerpiece for any celebration.

Whether you’re an experienced baker or just starting out, this heart cake is fun, beginner-friendly, and perfect for any occasion that calls for a little extra love. Let’s get baking!
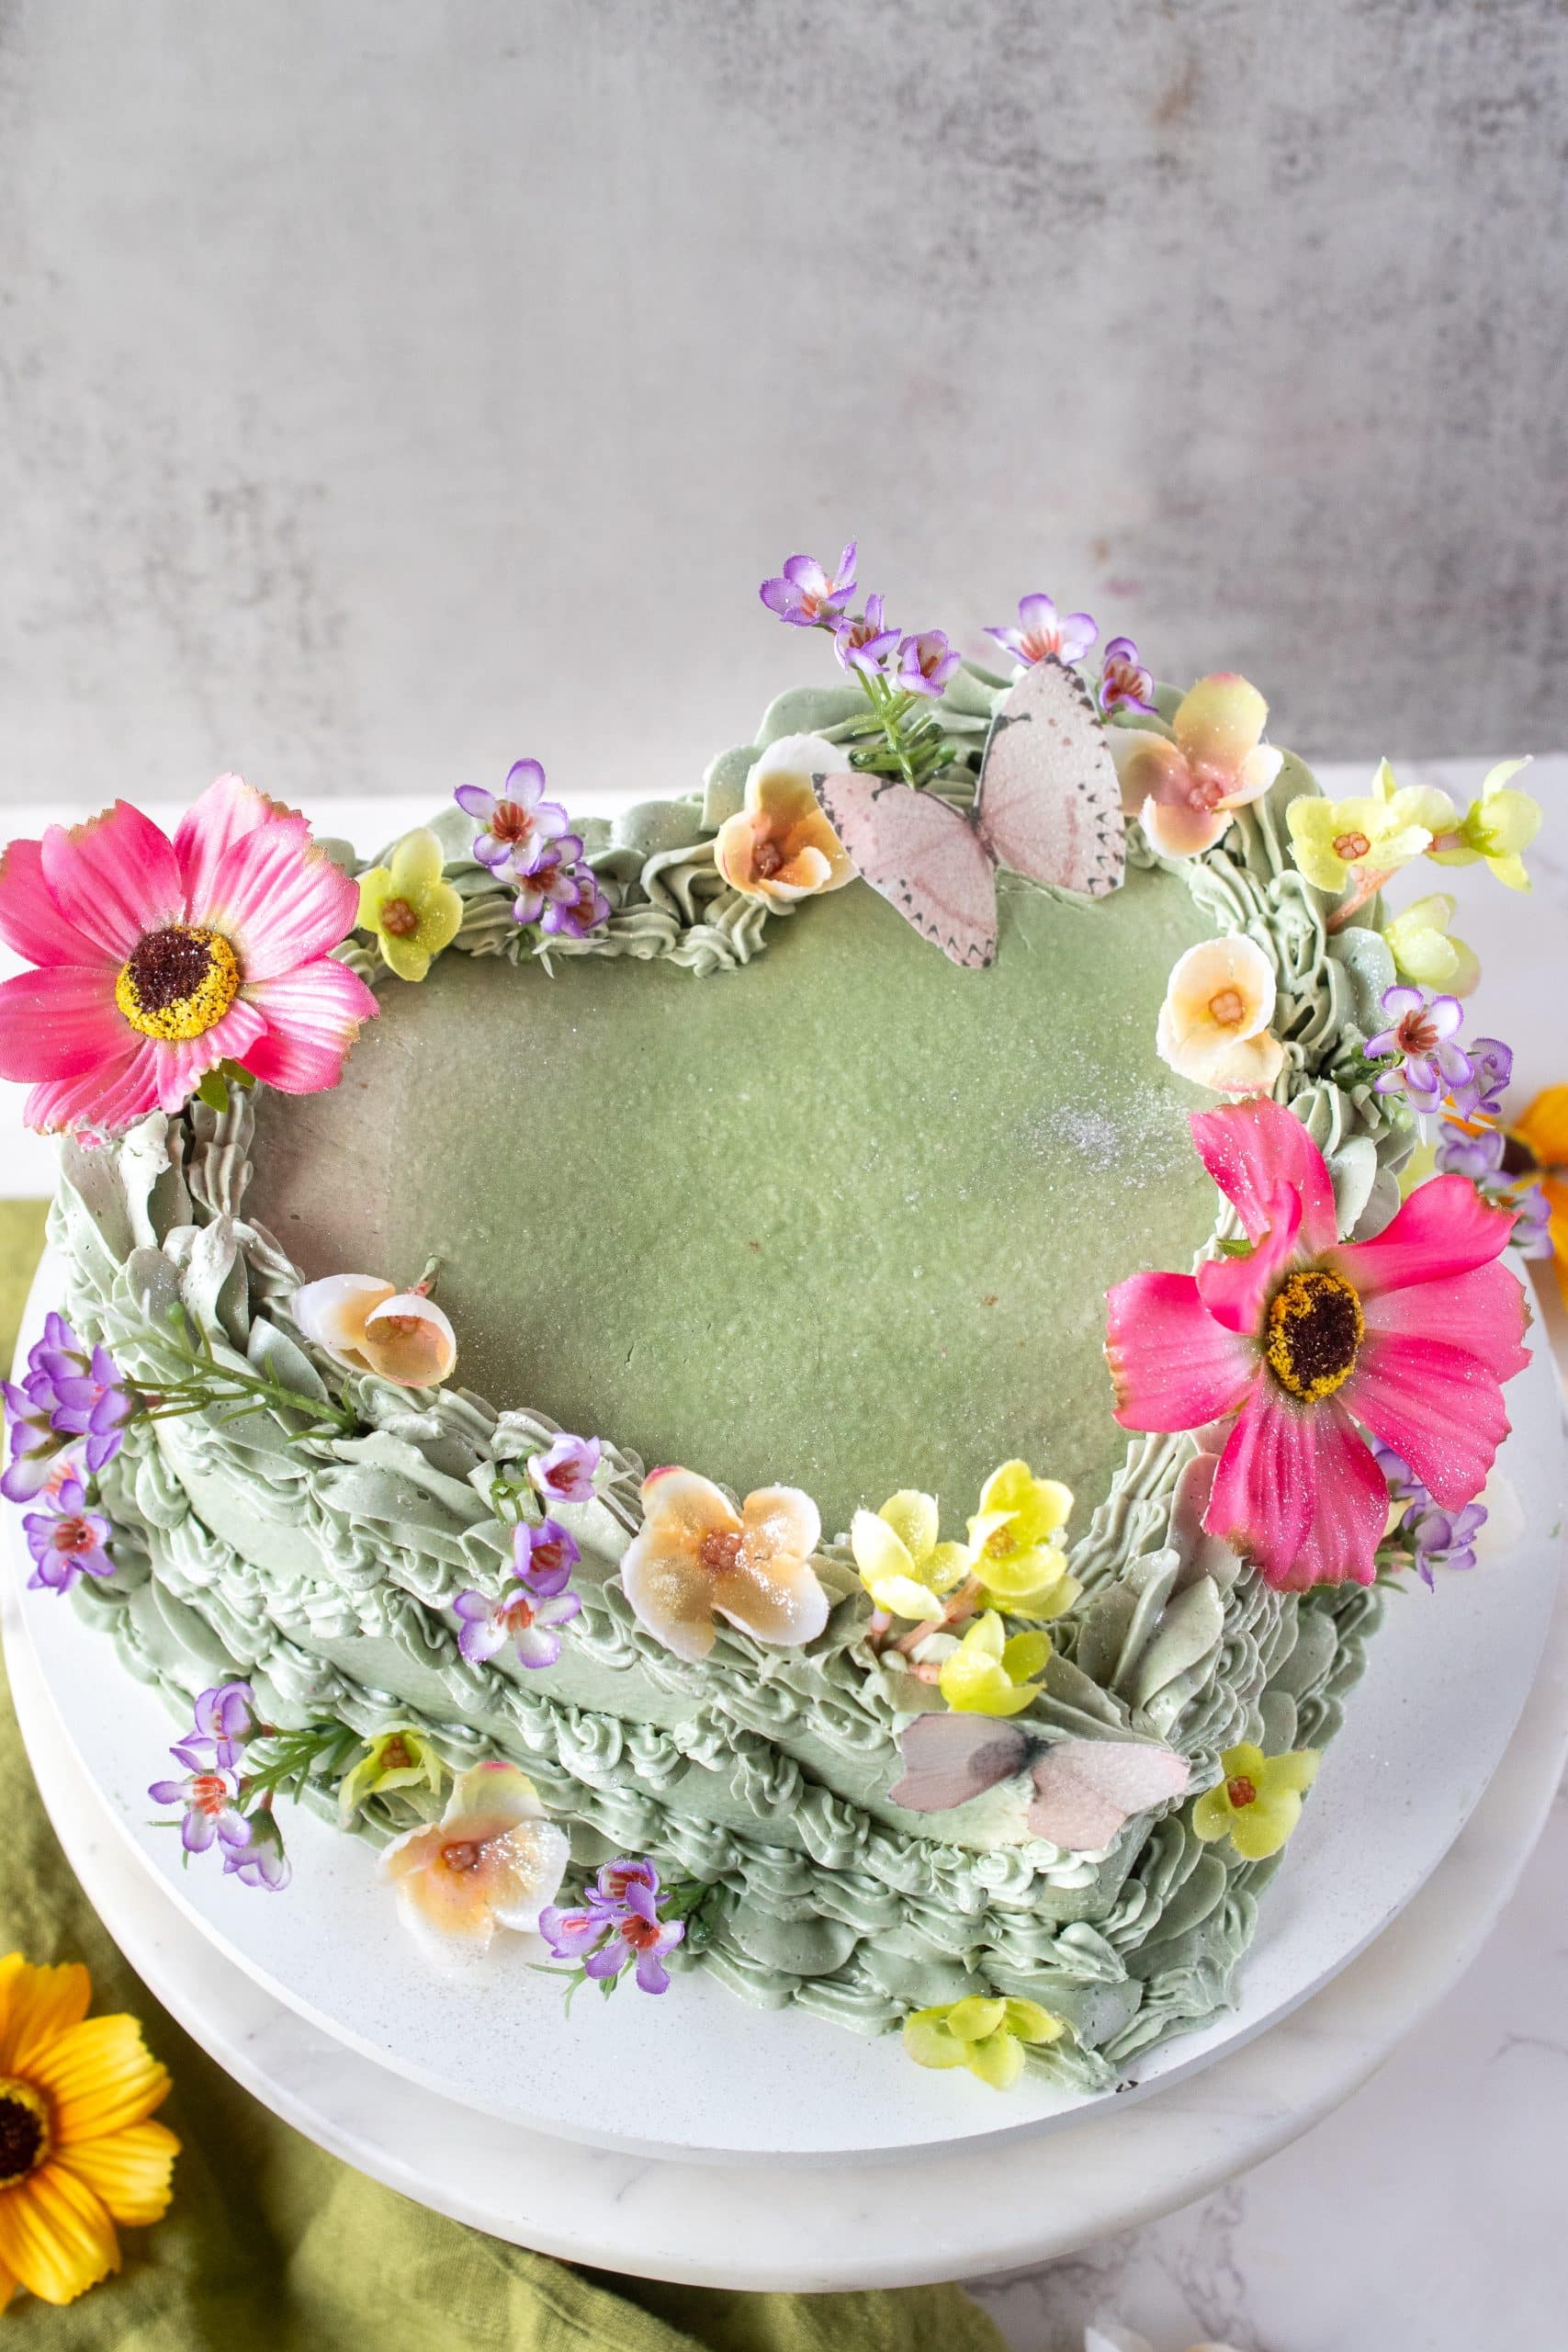
What is a Vintage Heart Cake?
If you’ve scrolled through cake Instagram lately, you’ve probably seen these vintage heart cakes covered in intricate piping and pastel colors. This style is heavily influenced by vintage Lambeth piping, but with a playful, modern twist.
Key Features of a Vintage Heart Cake:
- Layered heart shape – two or more tiers in a heart-shaped design
- Delicate piping – shells, rosettes, pearls, and ruffles
- Playful colors – soft pinks, baby blues, mint greens, or even bold red and black
- Personal touches – customized messages, edible pearls, or flowers
The Best Buttercream for a Heart Cake
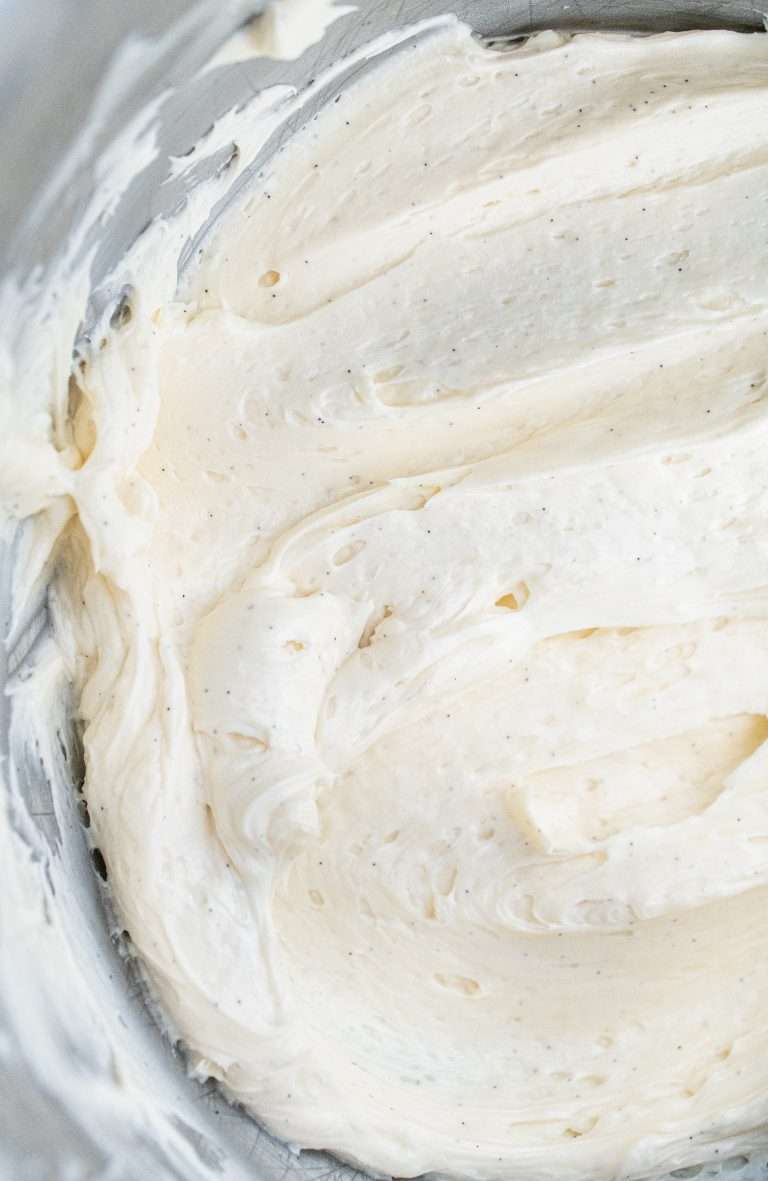
Let’s be real — the cake is important, but the frosting? That’s where the magic happens. For a vintage heart cake, you’ll want a buttercream that’s smooth, easy to work with, and holds its shape beautifully for all those decorative piped borders.
My go-to is my signature buttercream recipe — it’s silky smooth, pipes like a dream, and tastes incredible (none of that greasy, too-sweet stuff). Whether you’re going for soft vintage swirls, modern minimalism, or a fully piped masterpiece, this buttercream has you covered.
✨ Pro Tip: If you’re tinting your buttercream, gel food coloring works best — it gives you vibrant color without thinning out the frosting.
👉 Get my full buttercream recipe here: The ONLY Buttercream Recipe You’ll Ever Need
Are you vegan? No worries, check out my delicious vegan buttercream!
Tools You’ll Need to Make a Heart Cake
Before we dive into the step-by-step process, here’s everything you’ll need to create your perfect heart cake — from the right cake layers to all the fun piping tools for those vintage-inspired details.
Essential Tools
- Two 8-inch round cakes (baked and frozen — yes, frozen! Cold cakes are much easier to carve and frost)
- One batch of my Vanilla Buttercream (the more, the better — you can always freeze any leftover buttercream for future cakes)
- Offset spatula – Essential for spreading and smoothing buttercream.
- Cake turntable – Makes frosting so much easier, especially when you’re working on smooth sides or intricate piping.
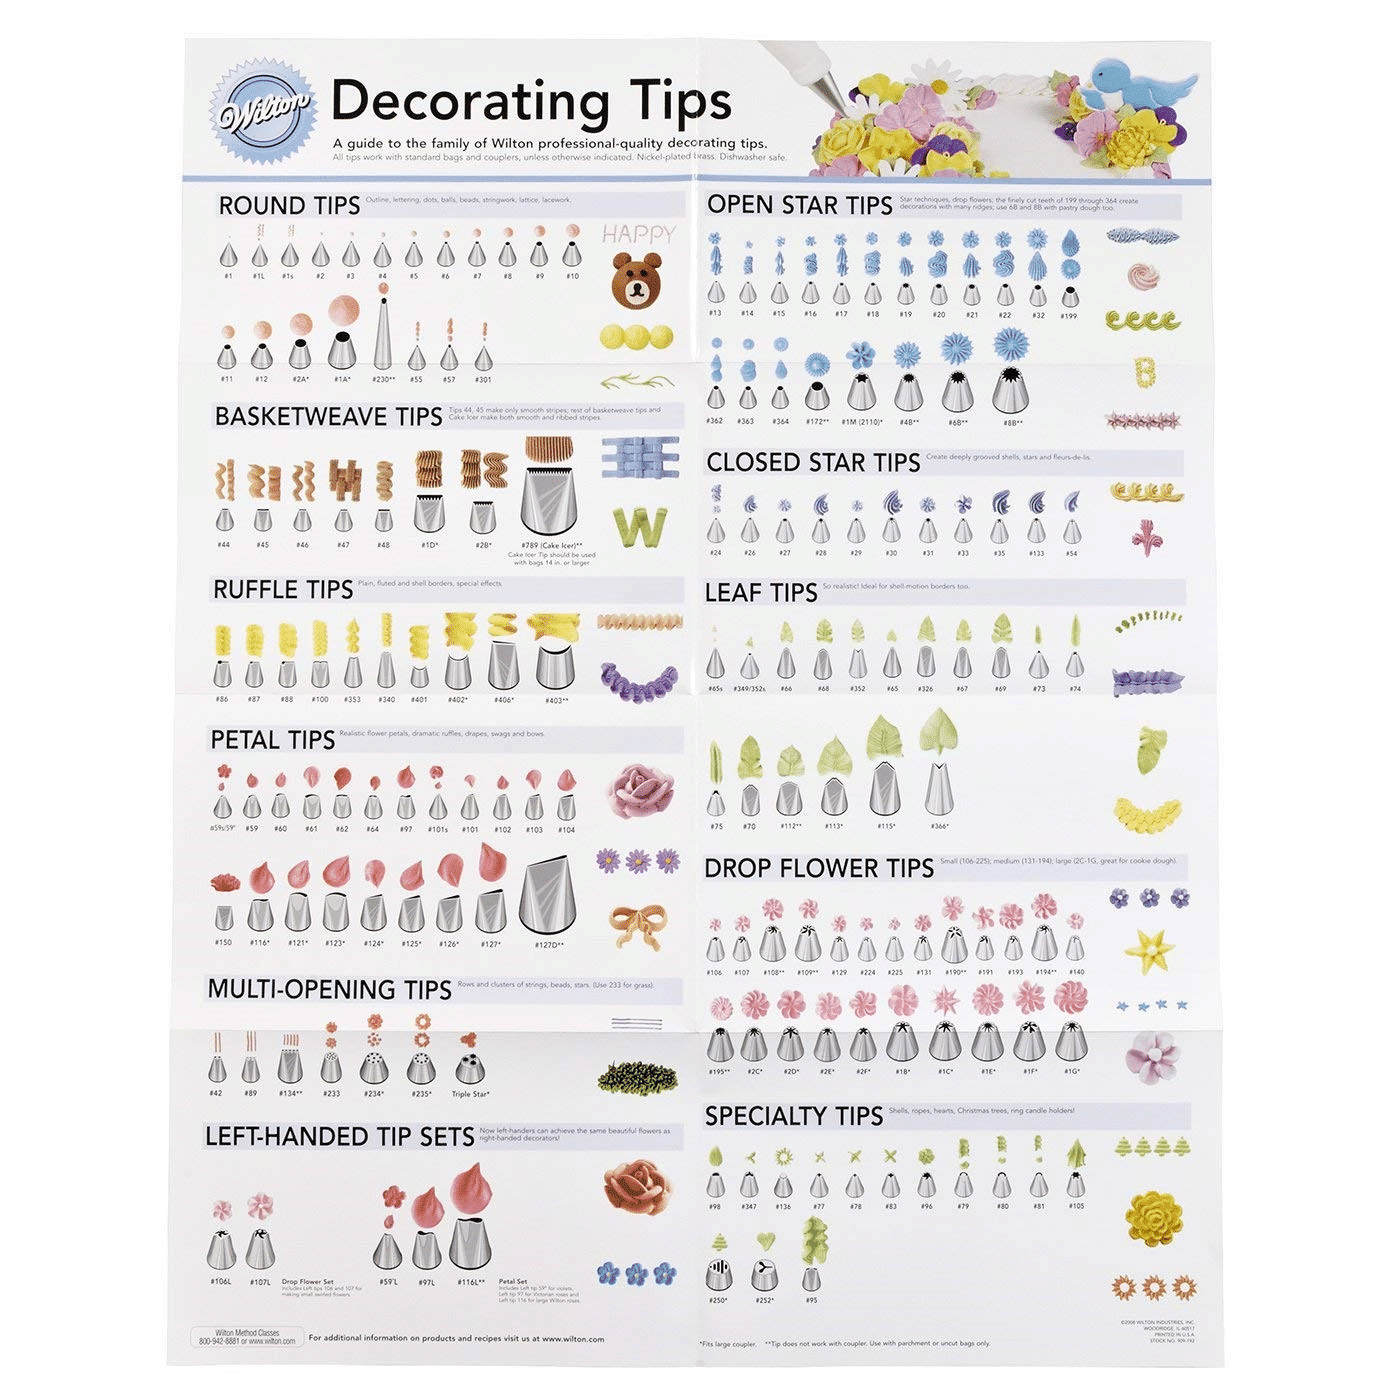
- Piping bags and assorted piping tips – Some of my absolute favorites for decorating a heart cake are: 1M, 2D, 4B, 102, and 74. These cover everything from buttercream rosettes to ruffles and delicate details, but honestly, any piping tips will work depending on your design and personal style. Don’t be afraid to experiment!
- Sharp knife (preferably serrated) – Great for leveling and carving the cake into a perfect heart shape.
- Cake scraper – A must for smoothing the sides of your cake if you’re going for a clean finish.
- 12-inch cake board or serving plate – Make sure it’s larger than your finished heart cake for easy decorating and presentation.
For a full list of all my favorite baking tools, check out my My All-Time Favorite Baking Tools (and Why I Swear By Them) post.
Optional (But Fun!) Extra
- Edible pearls or sprinkles – For adding vintage flair, sparkle, or a pop of color.
- Food coloring – Gel colors work best for vibrant shades without messing with the buttercream consistency.
- Lettering templates – If you want to pipe a cute message on top (think: “Be Mine” or “Love You”).
- Fresh flowers or bows – Adds a romantic or whimsical touch, depending on your style!
- Fondant Decor – Create fun fondant pieces to add to your cake. Try our Homemade Fondant Recipe: it’s basically edible play-dough but delicious.
With the right tools and a little creativity, you’ll be ready to whip up a heart cake that’s as beautiful as it is delicious.
👉 Pro Tip: Have a damp kitchen towel nearby to wipe your spatula and piping tips — clean tools make all the difference for smooth frosting and crisp piping.
Watch how to Make a Heart Cake:
Step 1: Stack and Carve Your Heart Cake
The easiest way to get a perfectly shaped heart cake — without needing any special pans — is to start with two round cakes stacked on top of each other. From there, you can carve the heart shape yourself. It’s easier than it sounds, and carving your own shape gives you way more control over how cute and curvy (or tall and narrow) your heart turns out.
Here’s exactly how I do it:
- Stack your two round cake layers with a layer of buttercream between them. I highly recommend working with cakes that are cold or even partially frozen — they’re so much easier to carve this way. If needed, pop the stacked cake into the fridge for about 15 minutes to firm up the buttercream before cutting.


2. Once your cake is chilled, lightly sketch a cross shape across the top cake layer. This divides the cake into even sections, making it easier to carve each side symmetrically. You can do this with a toothpick, the tip of a knife, or even the edge of your offset spatula.
3. Using a sharp serrated knife, cut away the two side sections of the cake. These pieces will become the rounded curves at the top of the heart, so save them!


4. Flip and attach those cut side pieces to the top of the cake with a bit of buttercream, creating the top arches of the heart. This simple trick gives you that classic heart shape with minimal waste.


5. To enhance that signature heart look, cut a small, shallow wedge out of the top center, right where the two curves meet. This creates the perfect dip that every heart cake needs.
6. Save the scraps for snacking (because you absolutely deserve it).


✨ Pro Tip: If freehand carving makes you nervous, you can always print out a heart template, cut it out, and trace around it lightly before cutting.
Step 2: Crumb Coat & Chill
Now that your heart cake is carved and those signature curves are in place, it’s time to lock everything in with a crumb coat. If you’re new to crumb coating, think of it as a thin, base layer of frosting that catches any loose crumbs, seals the cake, and gives you a smooth foundation for your final coat of buttercream.
Here’s how to do it:
- Spread a thin layer of buttercream all over the cake — top, sides, and even those carved areas where the pieces were attached.
- Don’t stress about it looking perfect — the crumb coat is just there to trap crumbs so they don’t sneak into your final layer of frosting.
- Use an offset spatula to smooth the buttercream over the surface and a bench scraper to clean up the edges.
- Once your cake is fully coated, pop it in the fridge for at least 20-30 minutes, or until the buttercream is firm to the touch. This helps the cake hold its shape and makes applying the final coat so much easier.
Why the Crumb Coat Matters
A crumb coat might seem like an optional step, but trust me — it’s the secret to getting a clean, professional-looking finish. Especially with a carved cake like this, where you’ve got seams and edges from the cut pieces, a crumb coat helps hold everything together and keeps your final frosting layer crumb-free.
Step 3: Final Frosting & Smooth Coat
Now for the fun (and slightly therapeutic) part — frosting your heart cake! Once your crumb coat is nice and chilled, it’s time to apply the final layer of buttercream and smooth everything out. This is where your heart cake really starts to come to life.
Here’s how I do it:
- Add a generous layer of buttercream all over the chilled cake — don’t be shy! I like to start with a big dollop on top, then work my way down the sides.
- Use an offset spatula to spread the frosting evenly across the top and sides, filling in any gaps or uneven spots from carving.
- If you want your cake to be a solid color (like pastel pink, lavender, or mint), you can tint your buttercream before this step and apply a colored smooth coat. This gives you a solid base to work with before adding your piped decorations.
- For that super-smooth finish, grab your bench scraper and gently glide it around the cake, scraping off any excess buttercream as you go. Don’t stress about perfection — piping and decorations will cover a lot of areas, especially around the edges.
- Once you’re happy with the shape and smoothness, chill the cake again for about 15 minutes to set the buttercream and make piping even easier.
✨ Pro Tip: If you’re going for a vintage heart cake with lots of piped details, the smooth coat doesn’t need to be flawless. Focus more on getting a well-defined heart shape, since the piping will hide minor imperfections.
Step 4: Piping & Decorating Ideas
Once your cake is smooth and chilled, it’s time to decorate your heart cake and bring your vision to life! Whether you’re aiming for a vintage-inspired masterpiece or something simple and modern, piping is where you can really get creative.


Here are a few of my favorite piping techniques and ideas for heart cakes:
1. Classic Shell Border
Use a 1M or 2D piping tip to pipe a shell border around the edges. This adds a soft, elegant touch and works beautifully for both vintage and modern designs.
2. Rosette Clusters
Want a little extra texture? Use the 1M tip to pipe clusters of rosettes along the edges or on top of the cake. You can even layer them with smaller stars or dots for extra detail.
3. Ruffled Edges
For a full vintage vibe, grab a petal tip (like a 104) and pipe ruffles along the outer edge of the heart. It’s retro, romantic, and absolutely adorable.
4. Piped Messages
Use a small round tip (like a 3 or 5) to write a cute message on top — think “Be Mine,” “Happy Birthday,” or even something fun like “Ugh, Fine.” If you’re worried about your handwriting, you can lightly trace your message with a toothpick first to use as a guide.
5. Pearls, Sprinkles & Edible Glam
Once your piping is in place, sprinkle on some edible pearls, heart sprinkles, or even a little edible glitter for extra flair. You can also tuck in fresh flowers or even a little satin bow for a polished finish.
✨ Pro Tip: Don’t be afraid to mix and match piping techniques — sometimes the best designs happen when you layer rosettes, shells, and ruffles all together! Below is a helpful chart on what each piping tip does.
Tips for Success
✨ Chill, Chill, Chill!
Working with cold cakes makes everything easier — from carving to frosting to piping. If the buttercream ever feels too soft, pop the cake (or your piping bag) into the fridge for a few minutes to firm up.
✨ Start with a Sketch
Even if you’re comfortable freehanding, lightly tracing your heart shape (and even your text if you’re adding a message) makes a world of difference. A toothpick or the tip of a knife works perfectly. Even go on Pinterest and find heart cake designs you like!
✨ Don’t Stress About Perfection
The charm of a homemade heart cake is in its personality! Whether you go for clean lines or over-the-top piping, the love you put into it shines through — and buttercream hides a multitude of mistakes.
✨ Extra Buttercream is Your Friend
It’s always better to have more buttercream than you think you’ll need — especially if you’re piping borders or multiple colors. Plus, extra buttercream freezes beautifully!
Heart Cake FAQ
Do I need a heart-shaped pan to make a heart cake?
Nope! This tutorial shows you exactly how to carve a heart cake using two round cakes — no special pan required. But if you already have a heart-shaped pan and want to save yourself some time, by all means, go for it!
What’s the best type of cake for carving?
The type of cake you use is totally up to you! My cakes are light, fluffy, and super soft, and they still carve beautifully as long as they’re well-chilled or even frozen before cutting. Don’t worry — freezing your cake won’t dry it out at all. In fact, it helps lock in moisture and makes shaping your heart cake so much easier.
If your vegan check out my Moist and Fluffy Vegan Vanilla Cake.
Can I make my heart cake ahead of time?
Absolutely! You can bake and carve the cake layers a day in advance, then wrap them tightly in plastic wrap and store them in the freezer. When you’re ready to decorate, you can decorate the cake while it’s still frozen — this actually makes frosting and piping much easier!
You can also fully frost and decorate the cake up to a day ahead — just store it in the fridge and bring it to room temperature before serving for the best flavor and texture.
What’s the best buttercream for piping?
My Signature Buttercream is my go-to for a reason — it’s smooth, stable, and holds its shape perfectly for all those cute borders and swirls.
Do I have to crumb coat the cake?
Technically, you could skip it — but I don’t recommend it. A crumb coat locks in all the loose crumbs and gives you a clean base layer to work on, making your final frosting and piping look so much better.
How do I get even piping all around the cake?
It helps to lightly mark your cake with where you want your piping to go — even just a few dots or guide marks can help keep things symmetrical.
How do I store my finished heart cake?
Store your finished heart cake in the fridge! It will stay fresh for up to a week (depending on your filling), and the buttercream will help seal in moisture to prevent it from drying out.
When you’re ready to serve, just let the cake sit at room temperature for about 1 hour so the buttercream softens up for the perfect slice.
Can I customize the colors and flavors?
Of course! That’s the best part. Whether you’re dreaming of pastel pink and vanilla, red velvet with cream cheese frosting, or even a bold black and gold heart cake, the possibilities are endless.
Ready to Make Your Own Heart Cake?
I hope this step-by-step heart cake tutorial gave you the confidence to try your own — and to have fun with it! Whether you keep it simple and sweet or go all out with vintage piping and bold colors, your heart cake is guaranteed to steal the show.
If you follow this tutorial, I’d love to see your vintage heart cakes! Tag me on Instagram @everythingjustbaked so I can hype you up and share your masterpiece.
Looking for other cake tutorials. Check out our super cute and easy Spring Easter Bunny Cake Tutorial. Perfect for beginners!